

Roll out the Office add-in
Put Context in Excel, Word and PowerPoint for everyone in your organization. This page is for the Microsoft 365 admin who deploys it; what people see once it is deployed is in Use Context in Office.
What you need
- A Microsoft 365 Global admin (or Exchange admin).
- The add-in file
context-office-manifest.xml. Context sends it to you (step 1 says what Context needs to make it). - The Entra group that already signs in to Context.
No app registration, Graph permission or admin consent is needed. People sign in with your existing Context sign-in.
Deploy the add-in
The admin center screens below are described from Microsoft’s documented path; the labels match the admin center.
Step 1: Send Context your Organization ID
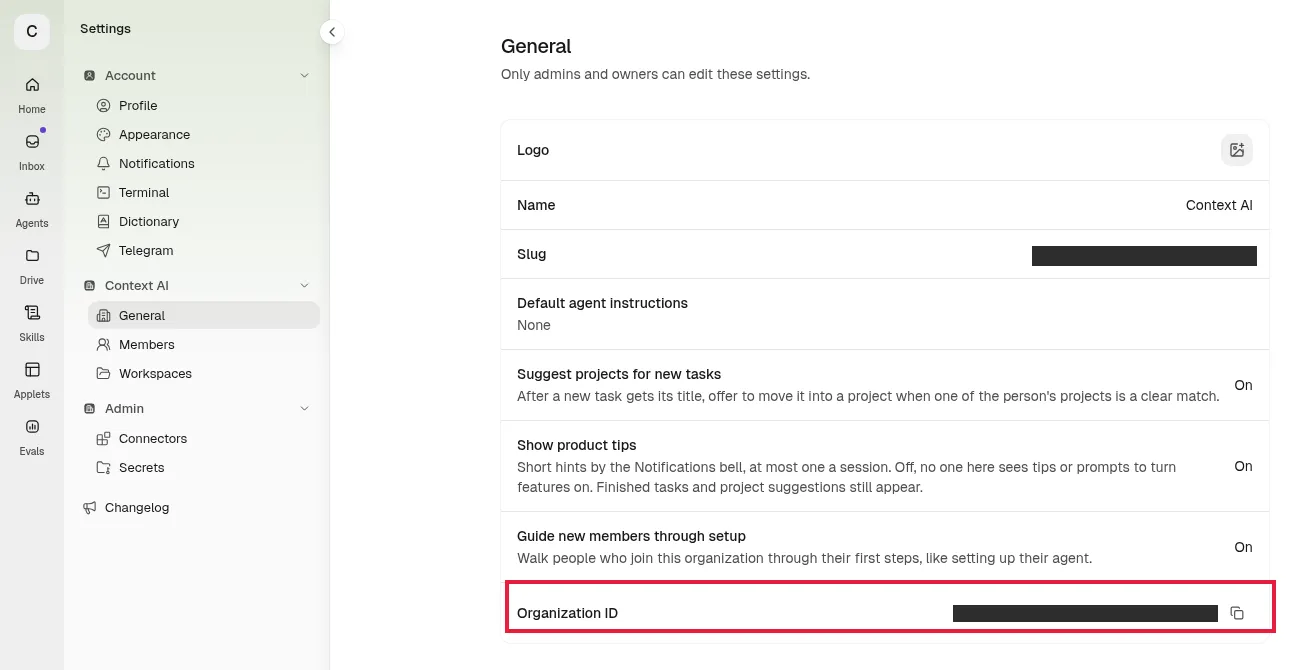
- In Context, open Settings → your organization → General. The address is
https://<your-context-host>/client/settings/org/general. - Copy the Organization ID.
- Send it to Context with your Context address, for example
context.yourcompany.com. Context makes your add-in file from these two values.
Step 2: Open Integrated apps
- Sign in to admin.microsoft.com.
- Go to Settings → Integrated apps (
https://admin.microsoft.com/#/Settings/IntegratedApps). - Select Upload custom apps.
What the screen shows:
| Area | Labels |
|---|---|
| Left navigation | Home, Users, Teams & groups, Billing, Settings (under it: Integrated apps, Org settings) |
| Toolbar | Get apps, Upload custom apps, Refresh |
| App list columns | Name, Publisher, Status (apps already deployed show Deployed) |
Step 3: Upload the file from Context
- In the Upload apps to deploy panel, for App type, choose Office Add-in.
- Under Choose how to upload, choose Upload manifest file (.xml) from device (the other option is Provide link to manifest file).
- Pick
context-office-manifest.xml, then select Next.
Step 4: Choose who gets it
- In Add users, select Specific users/groups (the other options are Just me and Entire organization).
- Add the same group that signs in to Context (for example a group named Context Users). Adding or removing someone from that group now grants or removes both.
- Select Next.
Important
The group must not be nested. A security group must be mail-enabled.
Step 5: Review and deploy
Context asks only to read and write the open document (what that covers).
- In Review and finish deployment, check the summary: App: Context, Assigned to: your group, Permissions: read and write the open document.
- Accept the permissions and select Finish deployment (or Back to change something).
- Select Done.
Step 6: Allow the network paths
Allow these from the computers that run Office:
| What | Address |
|---|---|
| Your Context address | for example https://context.yourcompany.com |
| Microsoft’s Office.js site (the pane loads Office.js, and the host scripts it pulls, from this folder on Microsoft’s CDN) | https://officeapis.public.onecdn.static.microsoft/1/ |
| Office for the web | *.officeapps.live.com, *.cloud.microsoft, *.sharepoint.com |
Warning
Your proxy must not add X-Frame-Options or Content-Security-Policy to /pane/office. Office for the web shows the pane inside its own pages, and Context already answers /pane/office with a policy that lets exactly the Office for the web addresses above frame it. After sign-in the pane opens the full Context app in the same frame, so the same applies to the Context app pages.
If Office.js cannot be reached, the pane waits up to 10 seconds, then says: “Office.js did not load. Check that your network allows Microsoft’s Office add-in library.”
Step 7: Wait, then check
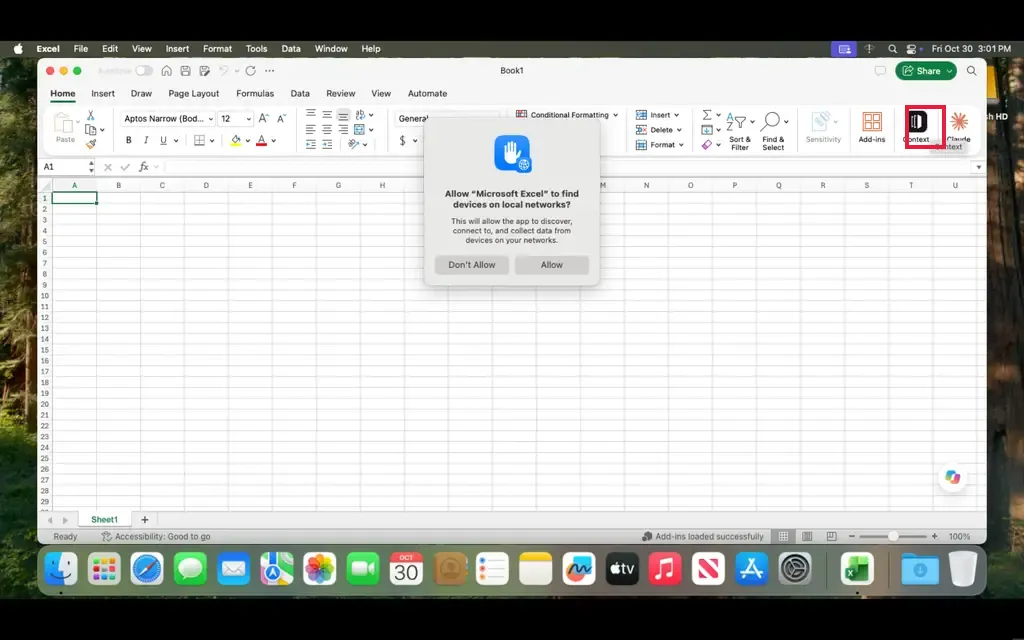
It appears within 24 hours, sometimes 72. Then check that people see Context where they expect it: see Where it appears.
Update the add-in
When Context sends you a new add-in file:
- Go to Integrated apps → Context → Update.
- Upload the new file from Context. Keep the same file name.