

Entra ID SAML
Set up Microsoft Entra ID single sign-on for Context.
Introduction
This guide connects Microsoft Entra ID to Context over SAML. An Entra administrator creates an enterprise application for Context, and the Context setup administrator finishes the connection with the metadata URL that application produces. Plan for both people to be available, since values pass between the two consoles in both directions.
Illustrative setup screens; copy the values from your Context deployment. Screens have been adapted for this walkthrough; they do not show a live deployment. Identifiers in the screenshots (tenant, application and object IDs, certificate thumbprints, user names) are placeholders.
For the other sign-in methods and where each one is set up, see Sign-in options.
What Context provides
In your Context deployment, open /setup, select Add provider → SAML and enter a provider name.
- On the Authentication page of the setup console, in the Single Sign-On card, select Add provider.
- On Choose a protocol, select SAML.
- Under Provide an Identity Provider Name, enter the name people will see for this sign-in option (the field asks What should people call this sign-in option?), then select Continue.
The next screen (Create a SAML application) shows the two values Entra needs: the Service provider entity ID and the Assertion consumer service (ACS) URL.
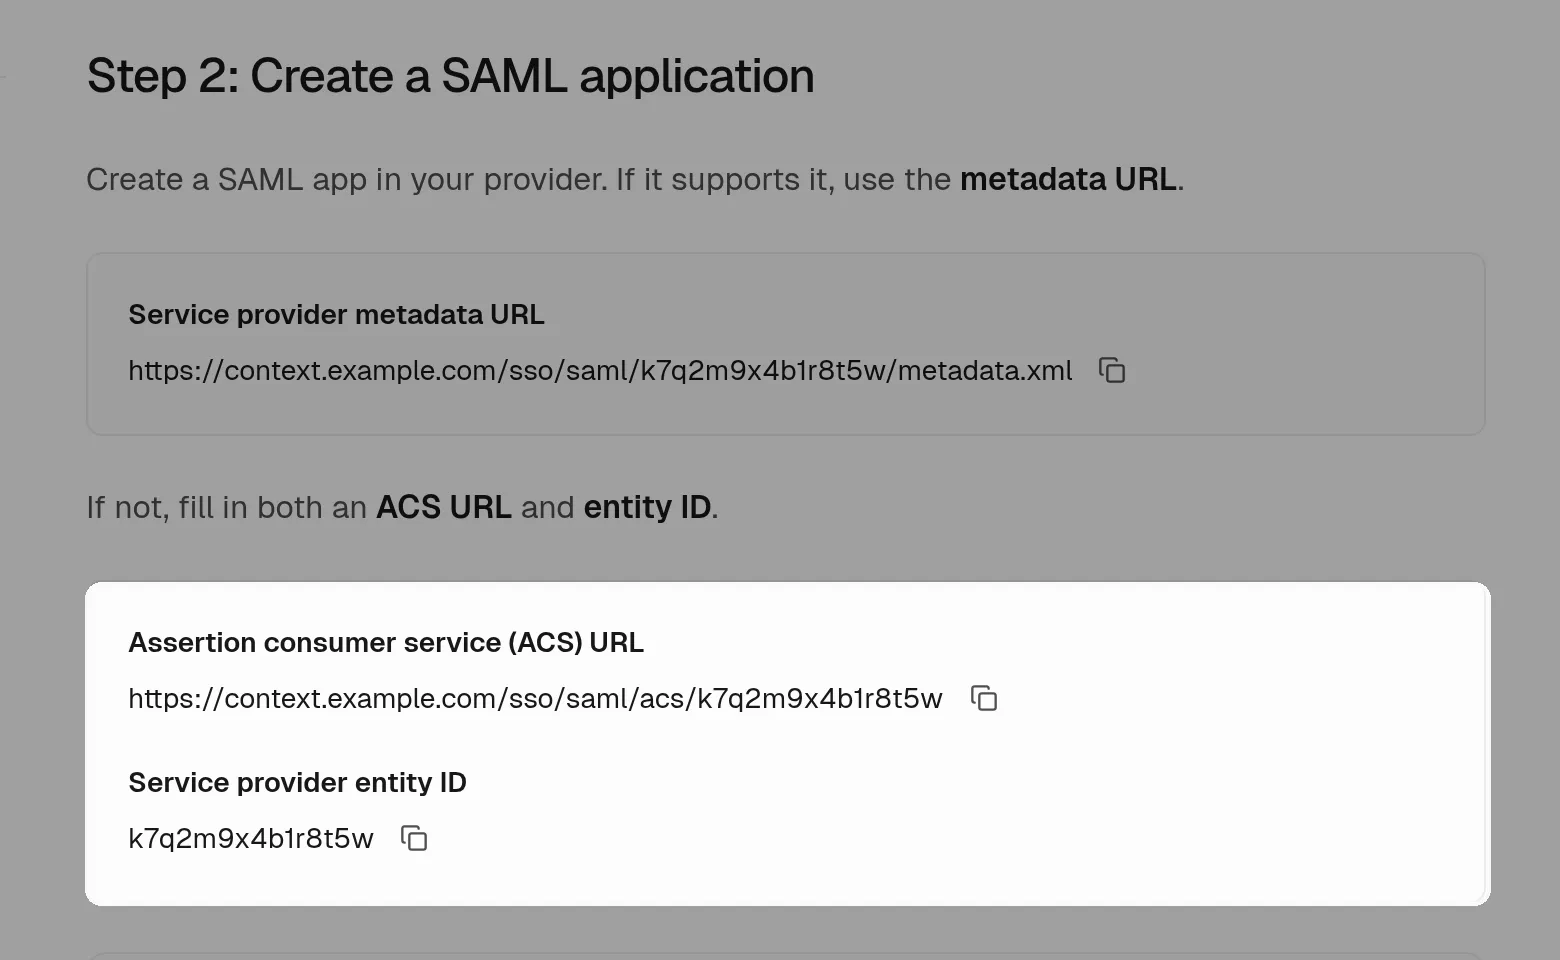
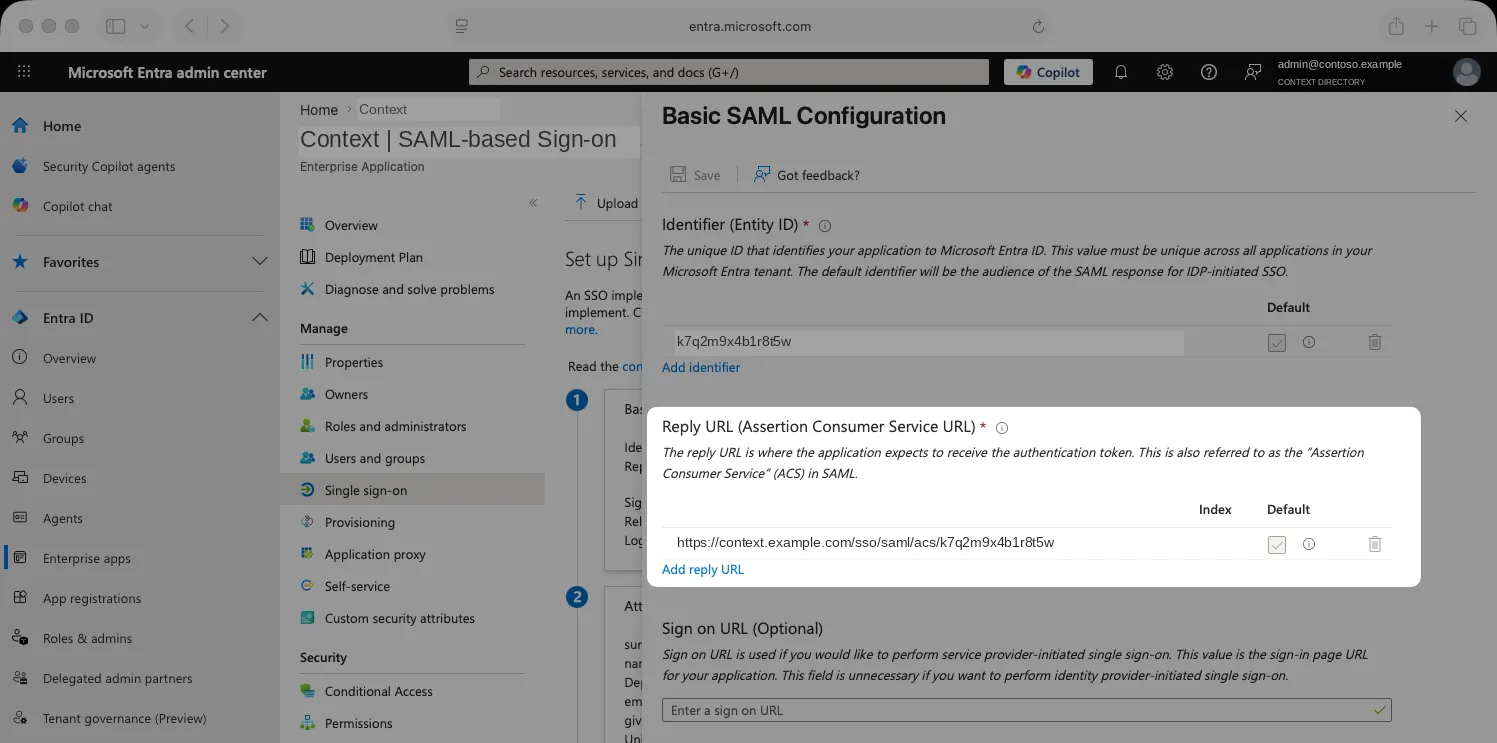
The ACS URL is where Entra sends the sign-in response. In Entra it goes in Reply URL (Assertion Consumer Service URL).
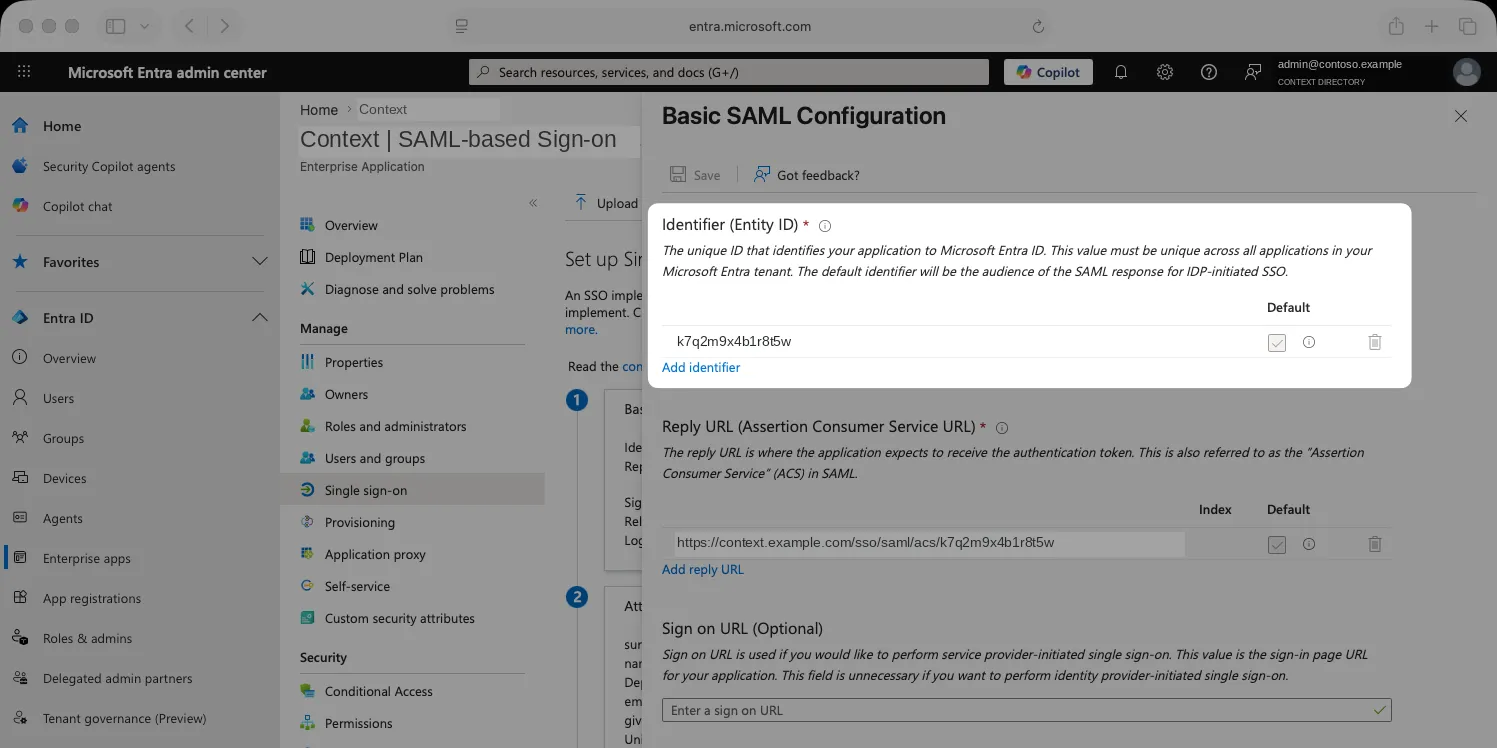
The entity ID identifies Context as the service provider. In Entra it goes in Identifier (Entity ID). Copy both values exactly as Context shows them; never type them by hand or reuse values from another service.
The same screen also shows a Service provider metadata URL (https://<your-context-host>/sso/saml/<connection-id>/metadata.xml) for identity providers that can read service provider metadata. For Entra, use the entity ID and ACS URL as this guide describes. The ACS URL has the form https://<your-context-host>/sso/saml/acs/<connection-id>.
What you need
Before you start, have the following ready:
- An Entra administrator who can create and configure enterprise applications.
- Access to the Context setup console, and the entity ID and ACS URL shown there.
- A pilot user whose Entra mail attribute is filled in.
Step 1: Log in
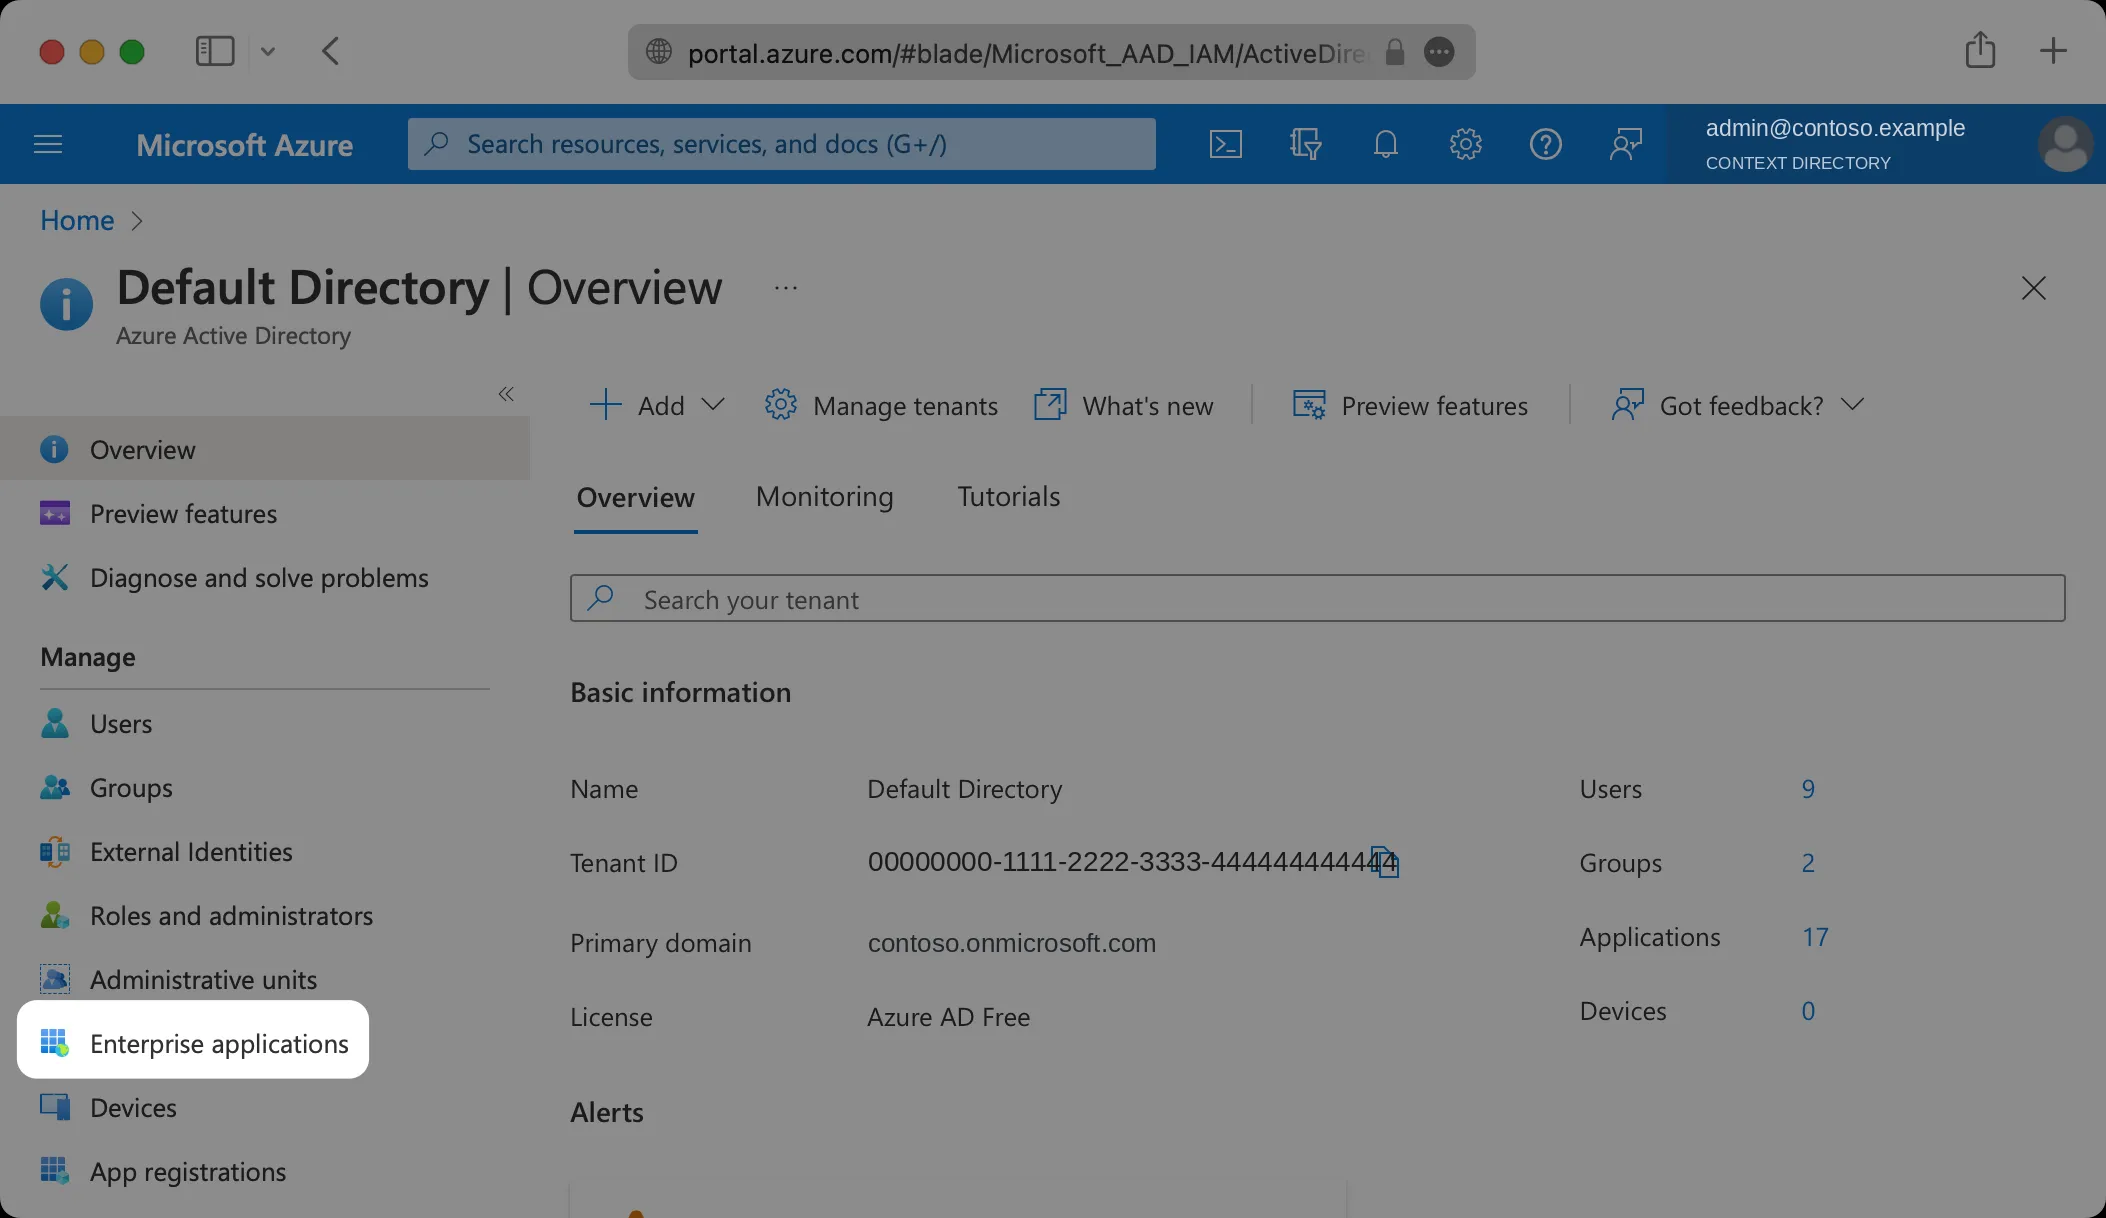
- Sign in to the Microsoft Entra admin center and go to Entra ID → Enterprise apps.
Step 2: Select or create your application
-
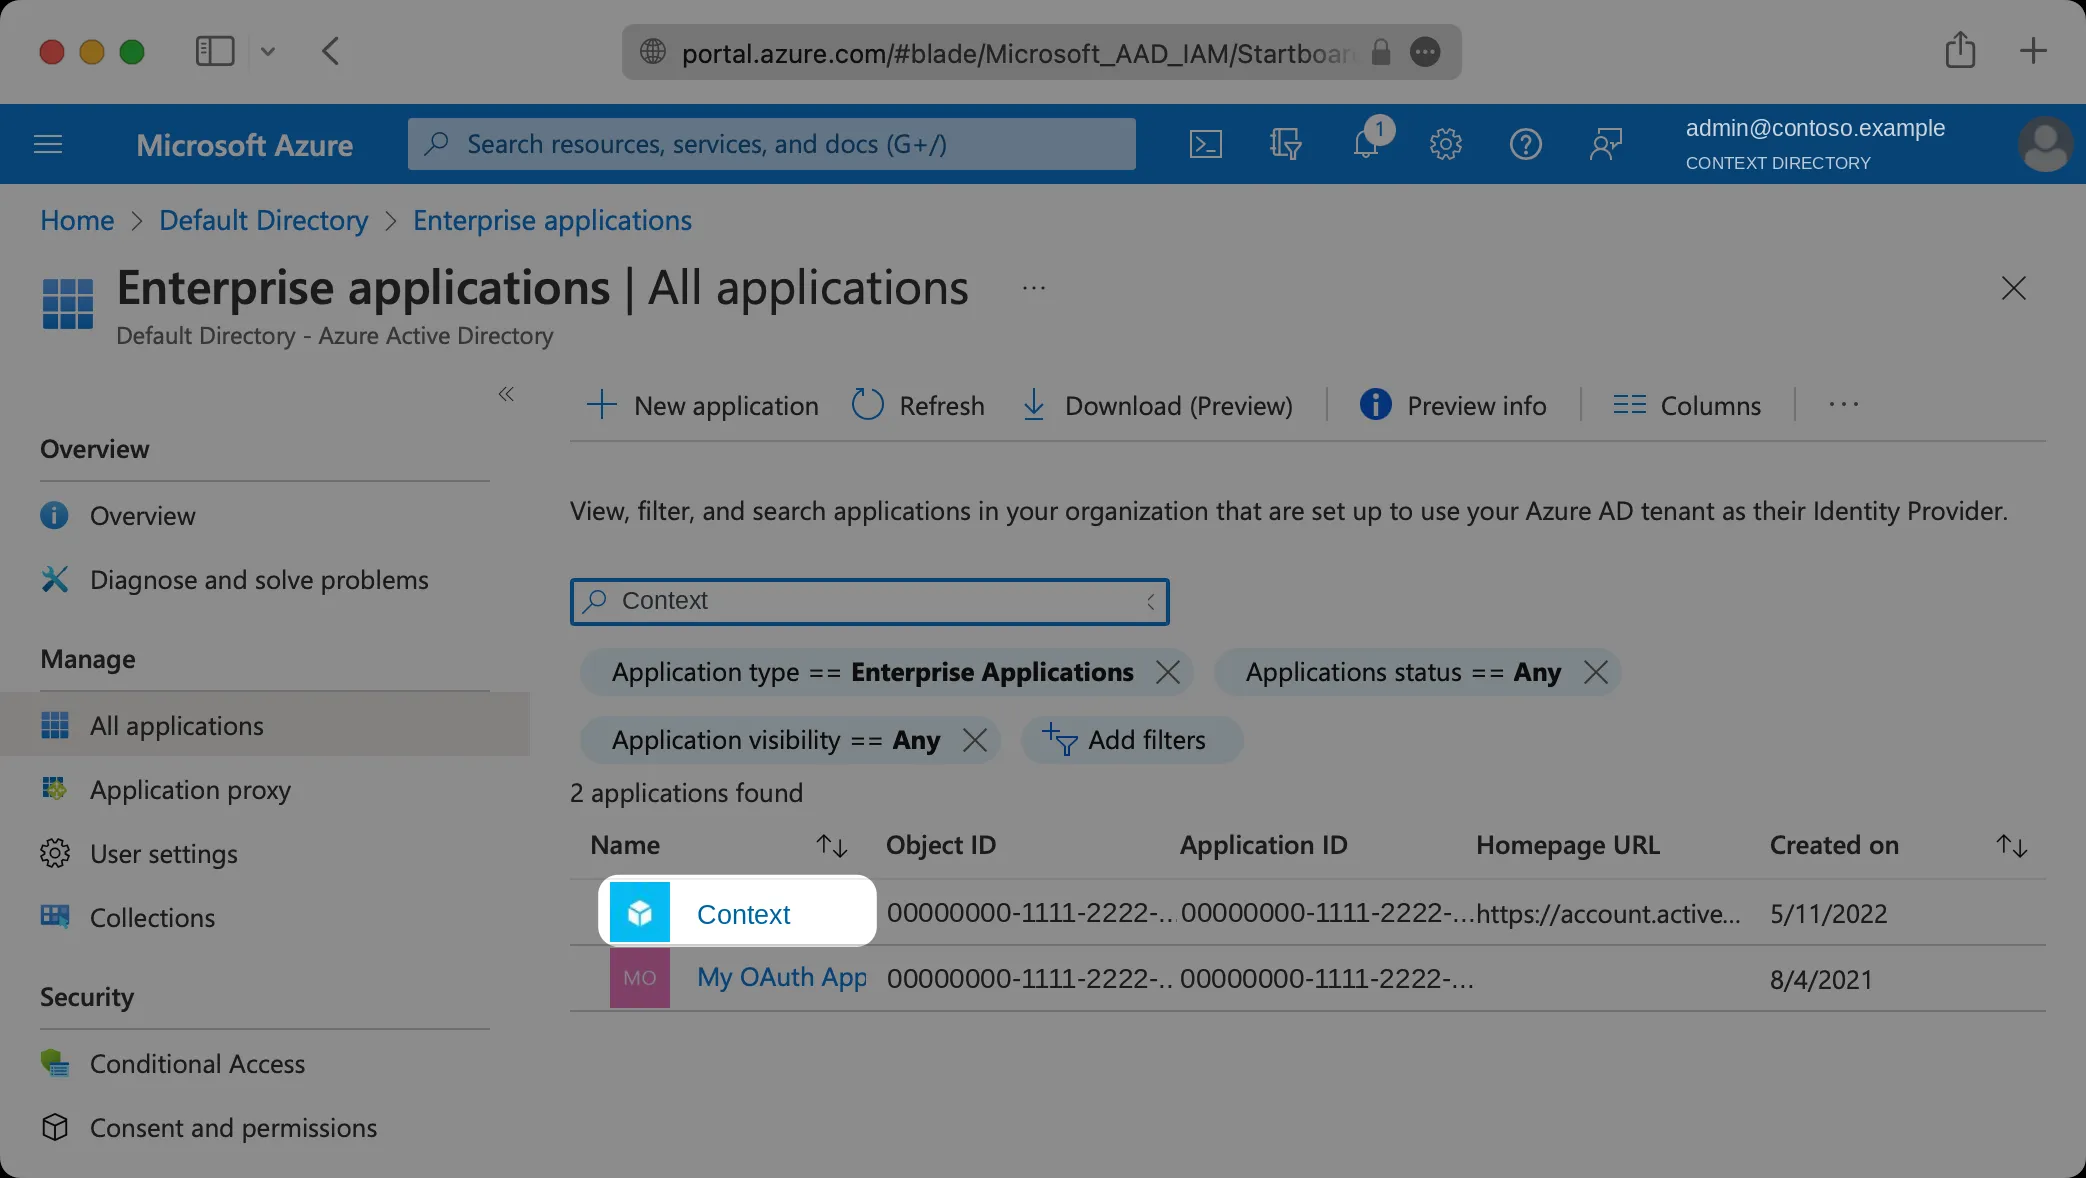
If a Context application already exists, select it from All applications, then check its settings against steps 4 to 6 before you copy its metadata URL.
-
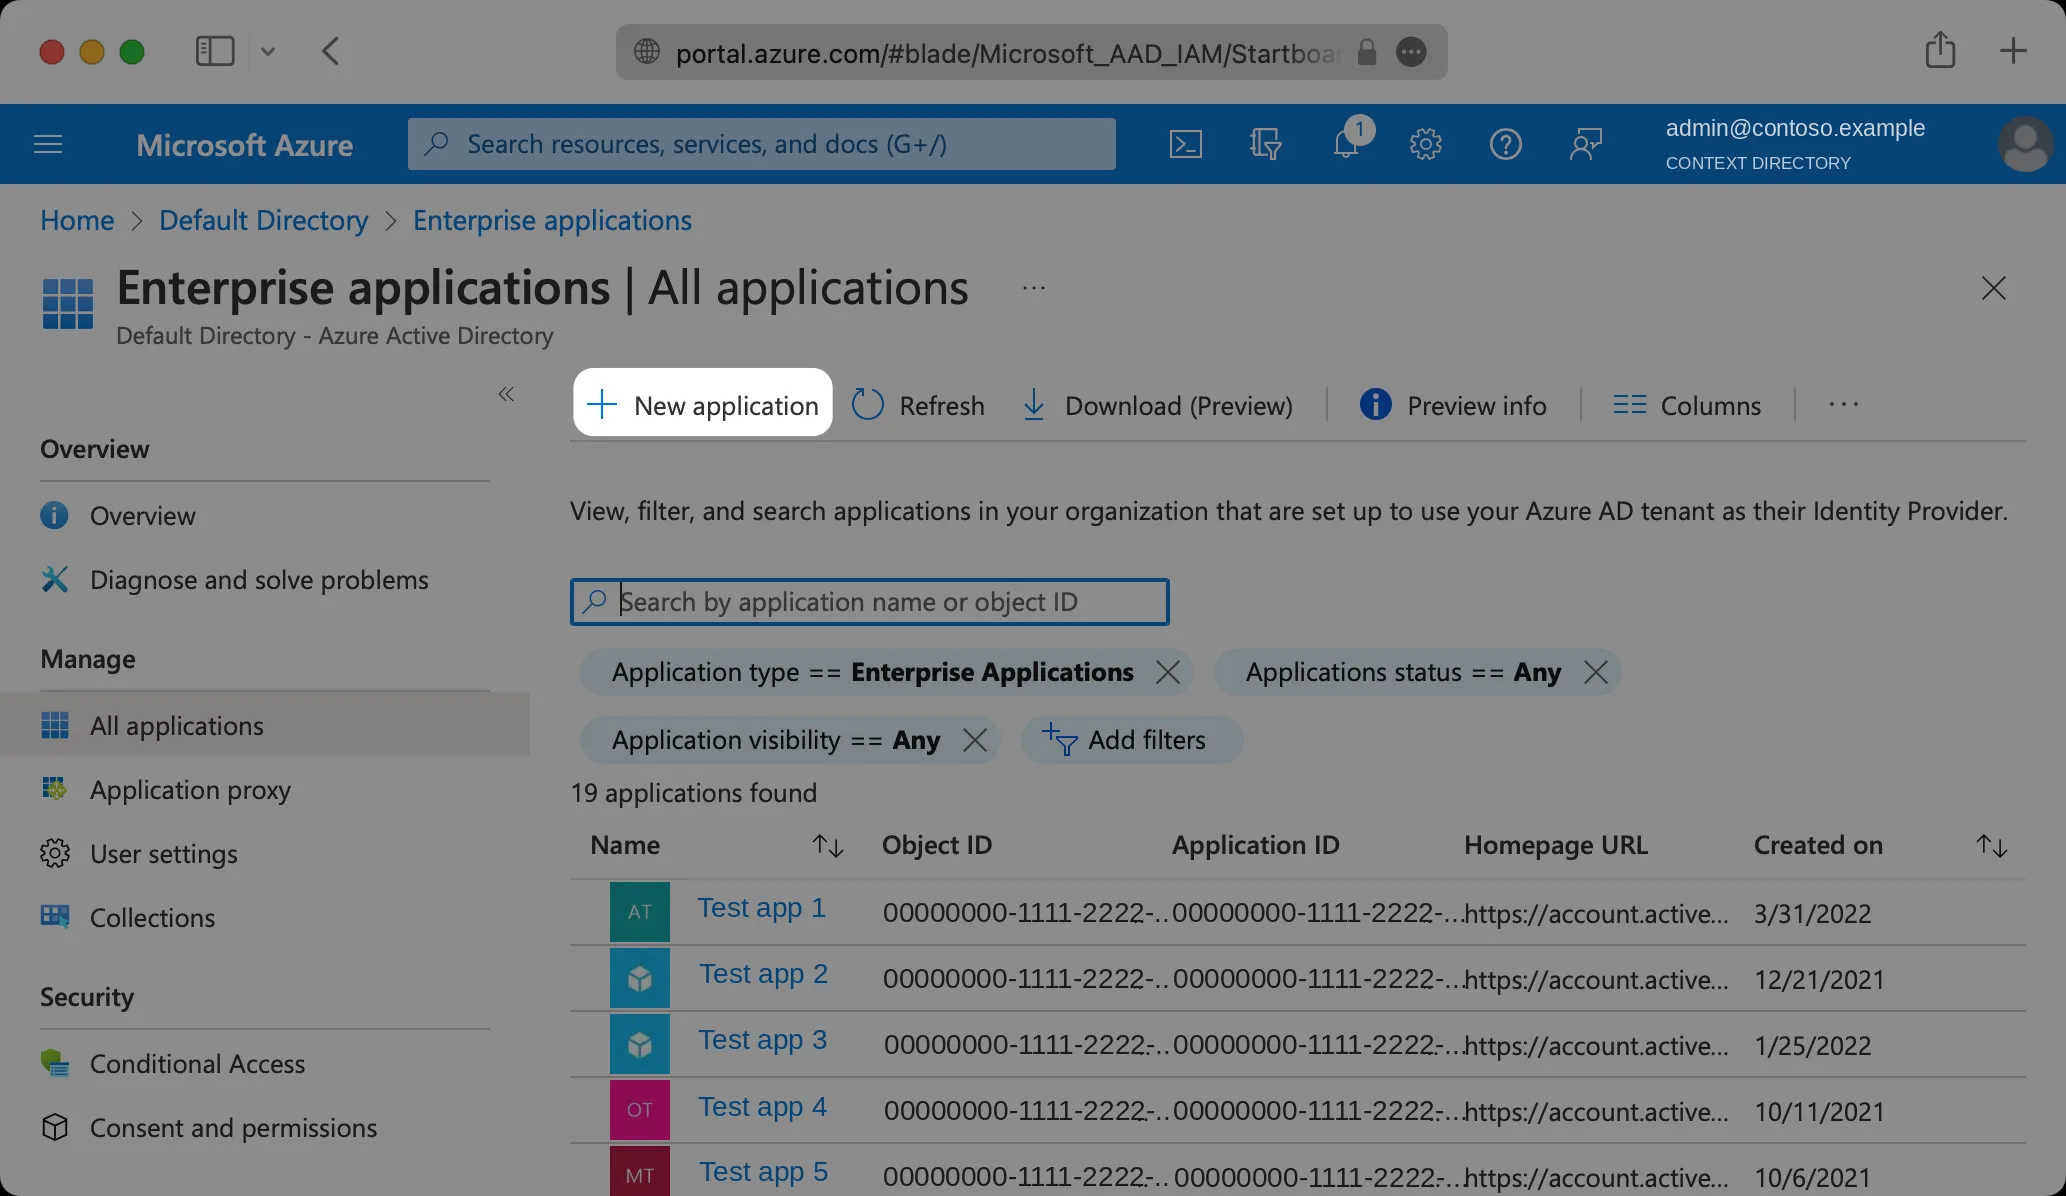
Otherwise, select New application.
Step 3: Initial SAML application setup
-
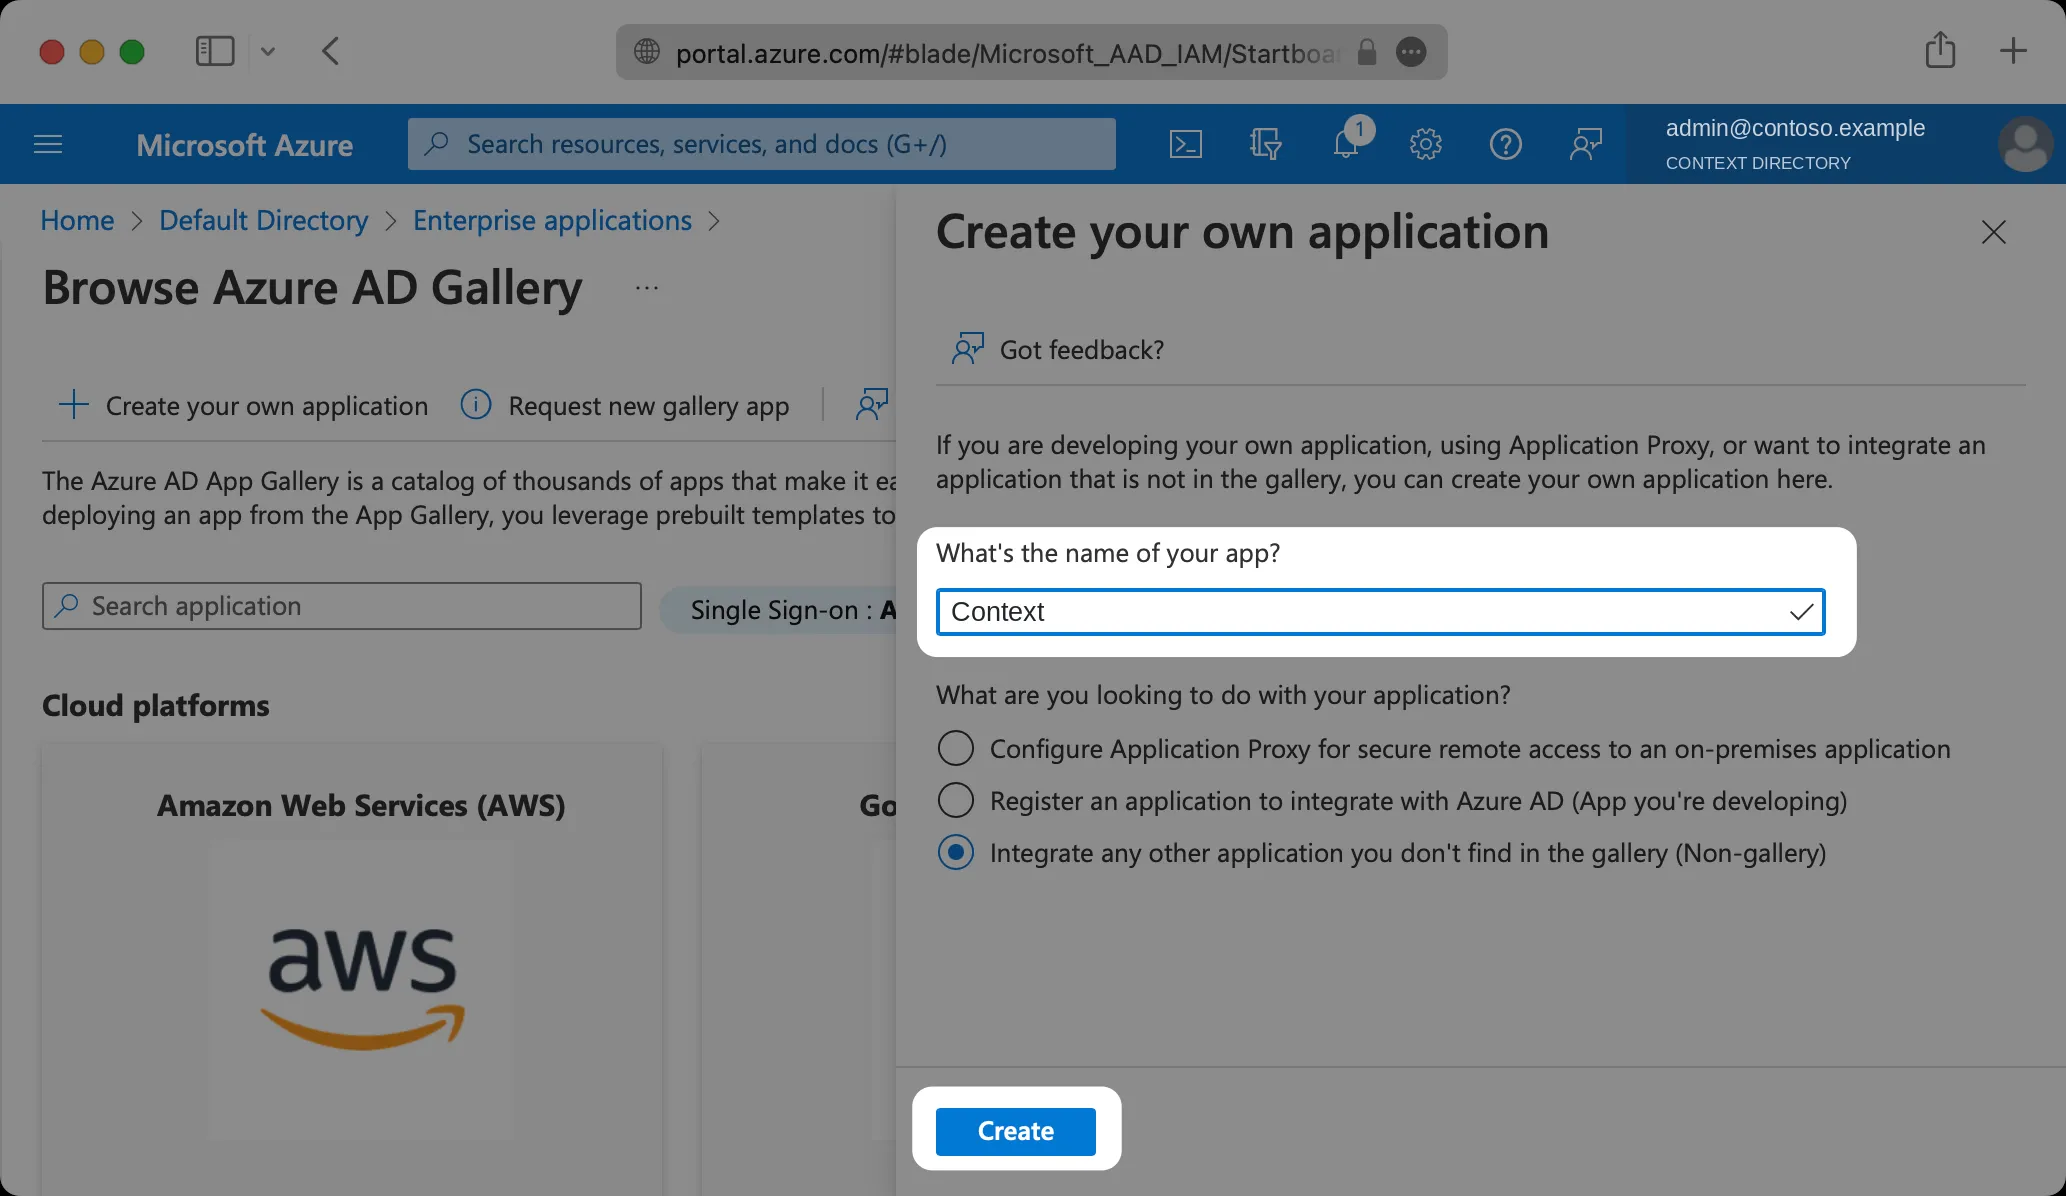
Select Create your own application and name it
Context. -
Choose Integrate any other application you don’t find in the gallery (Non-gallery), then select Create. Use a non-gallery application even if the gallery lists one with a similar name.
-
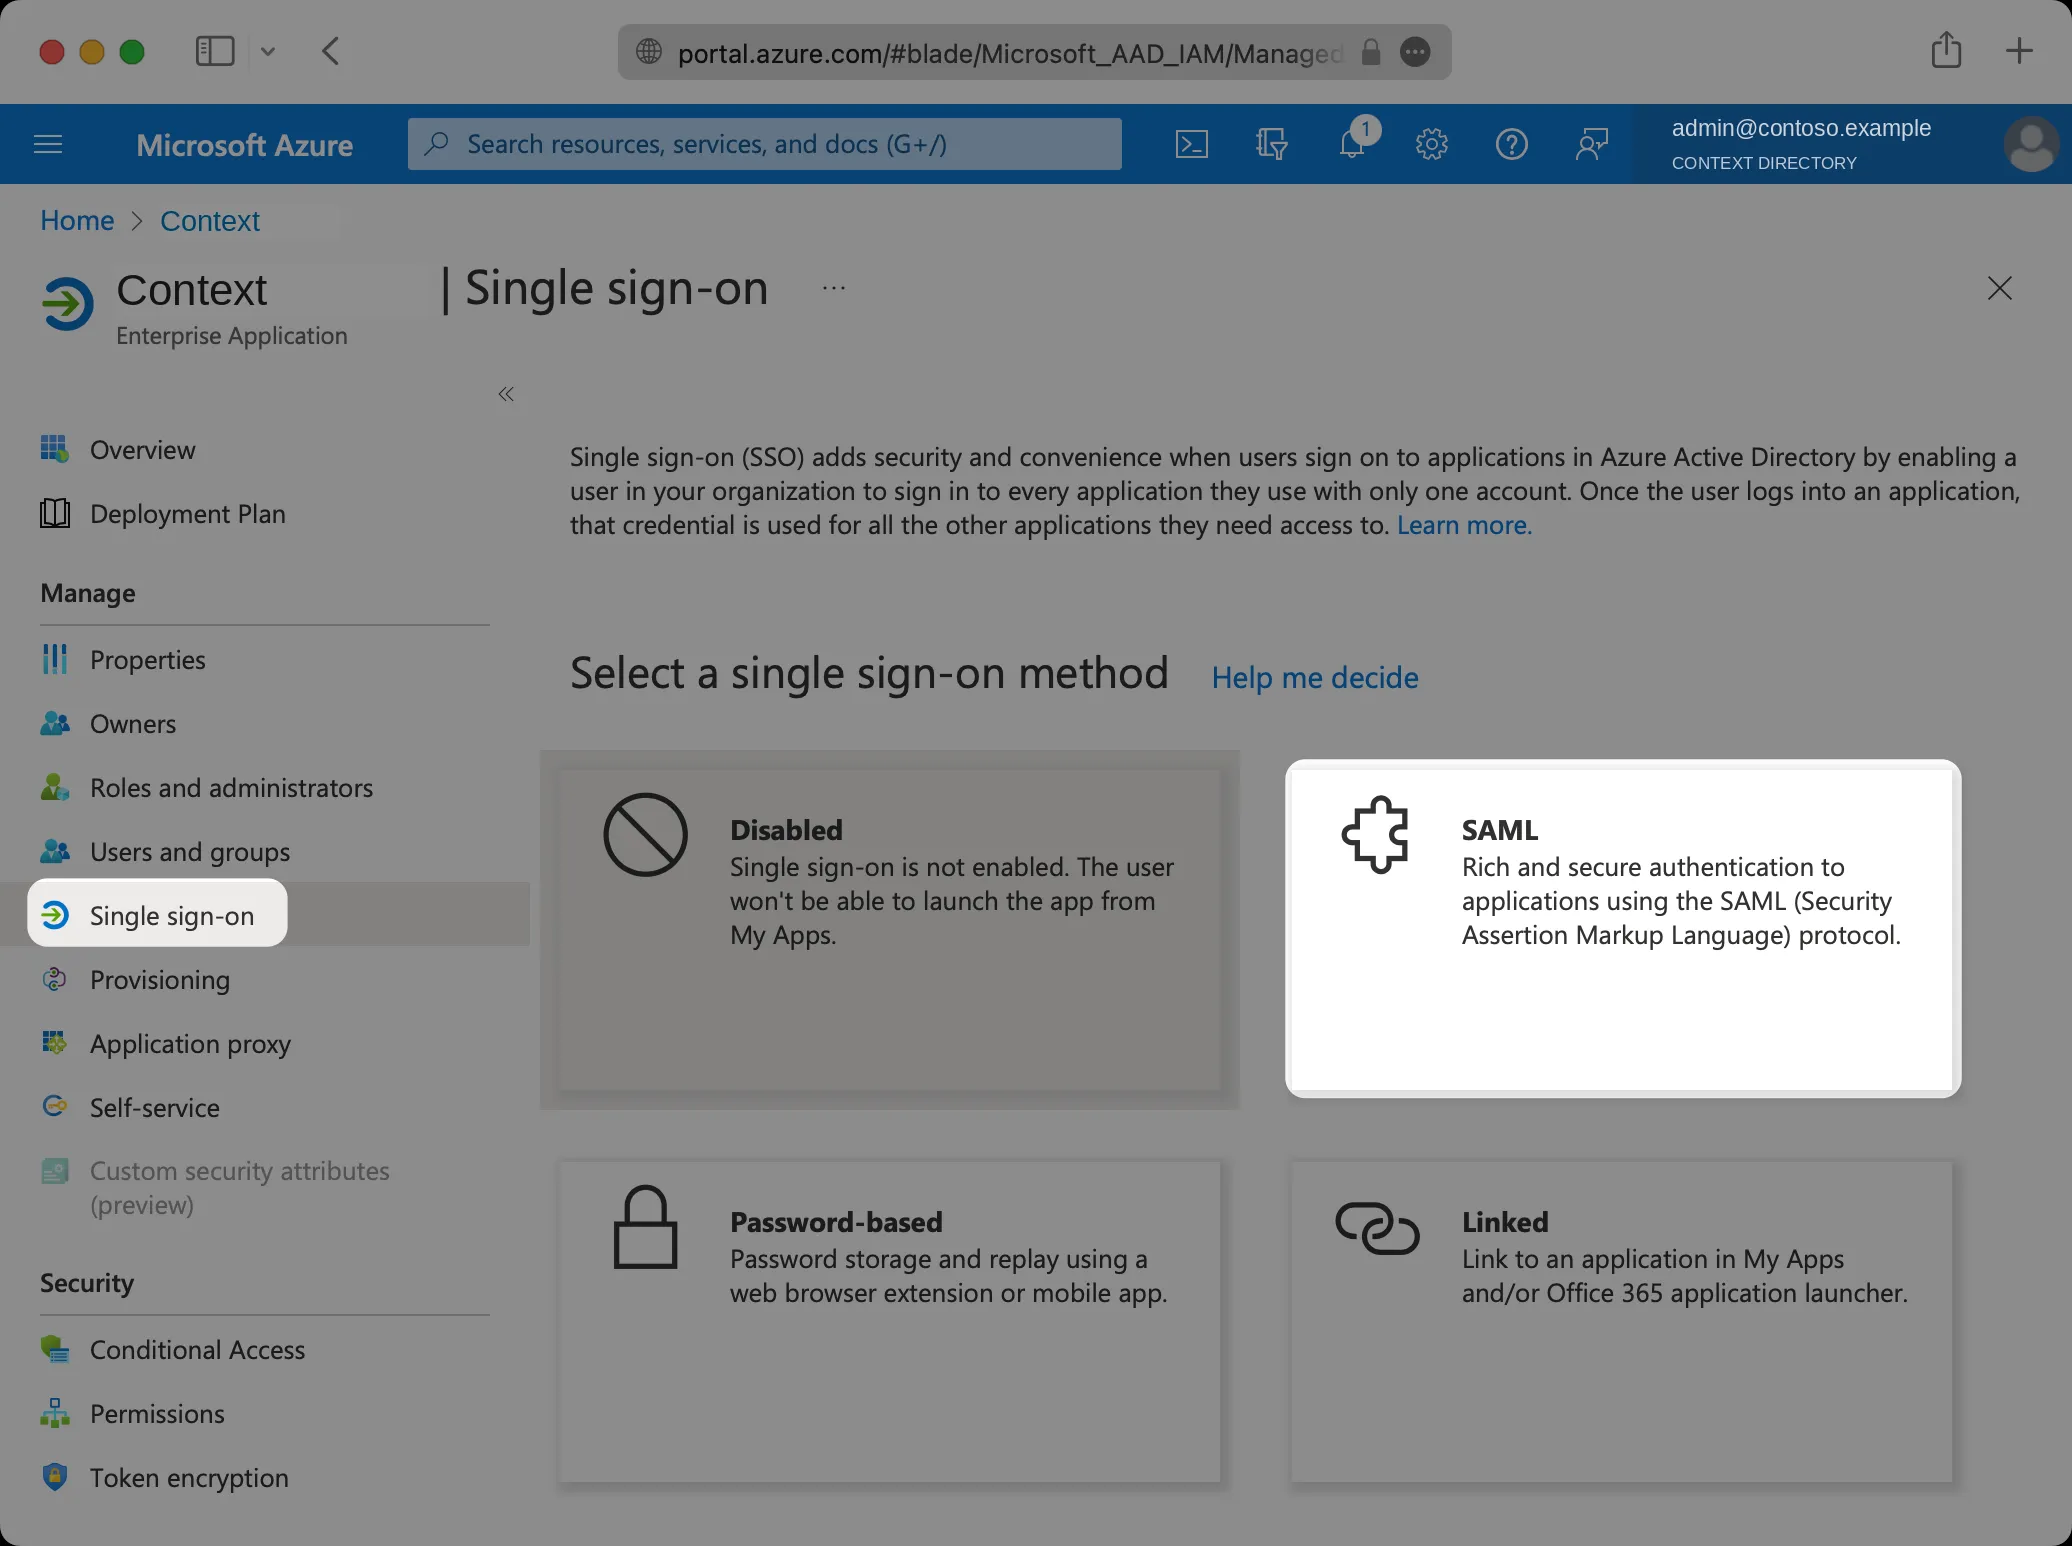
In the new application, open Manage → Single sign-on and choose SAML as the sign-on method.
Step 4: Configure the SAML application
-
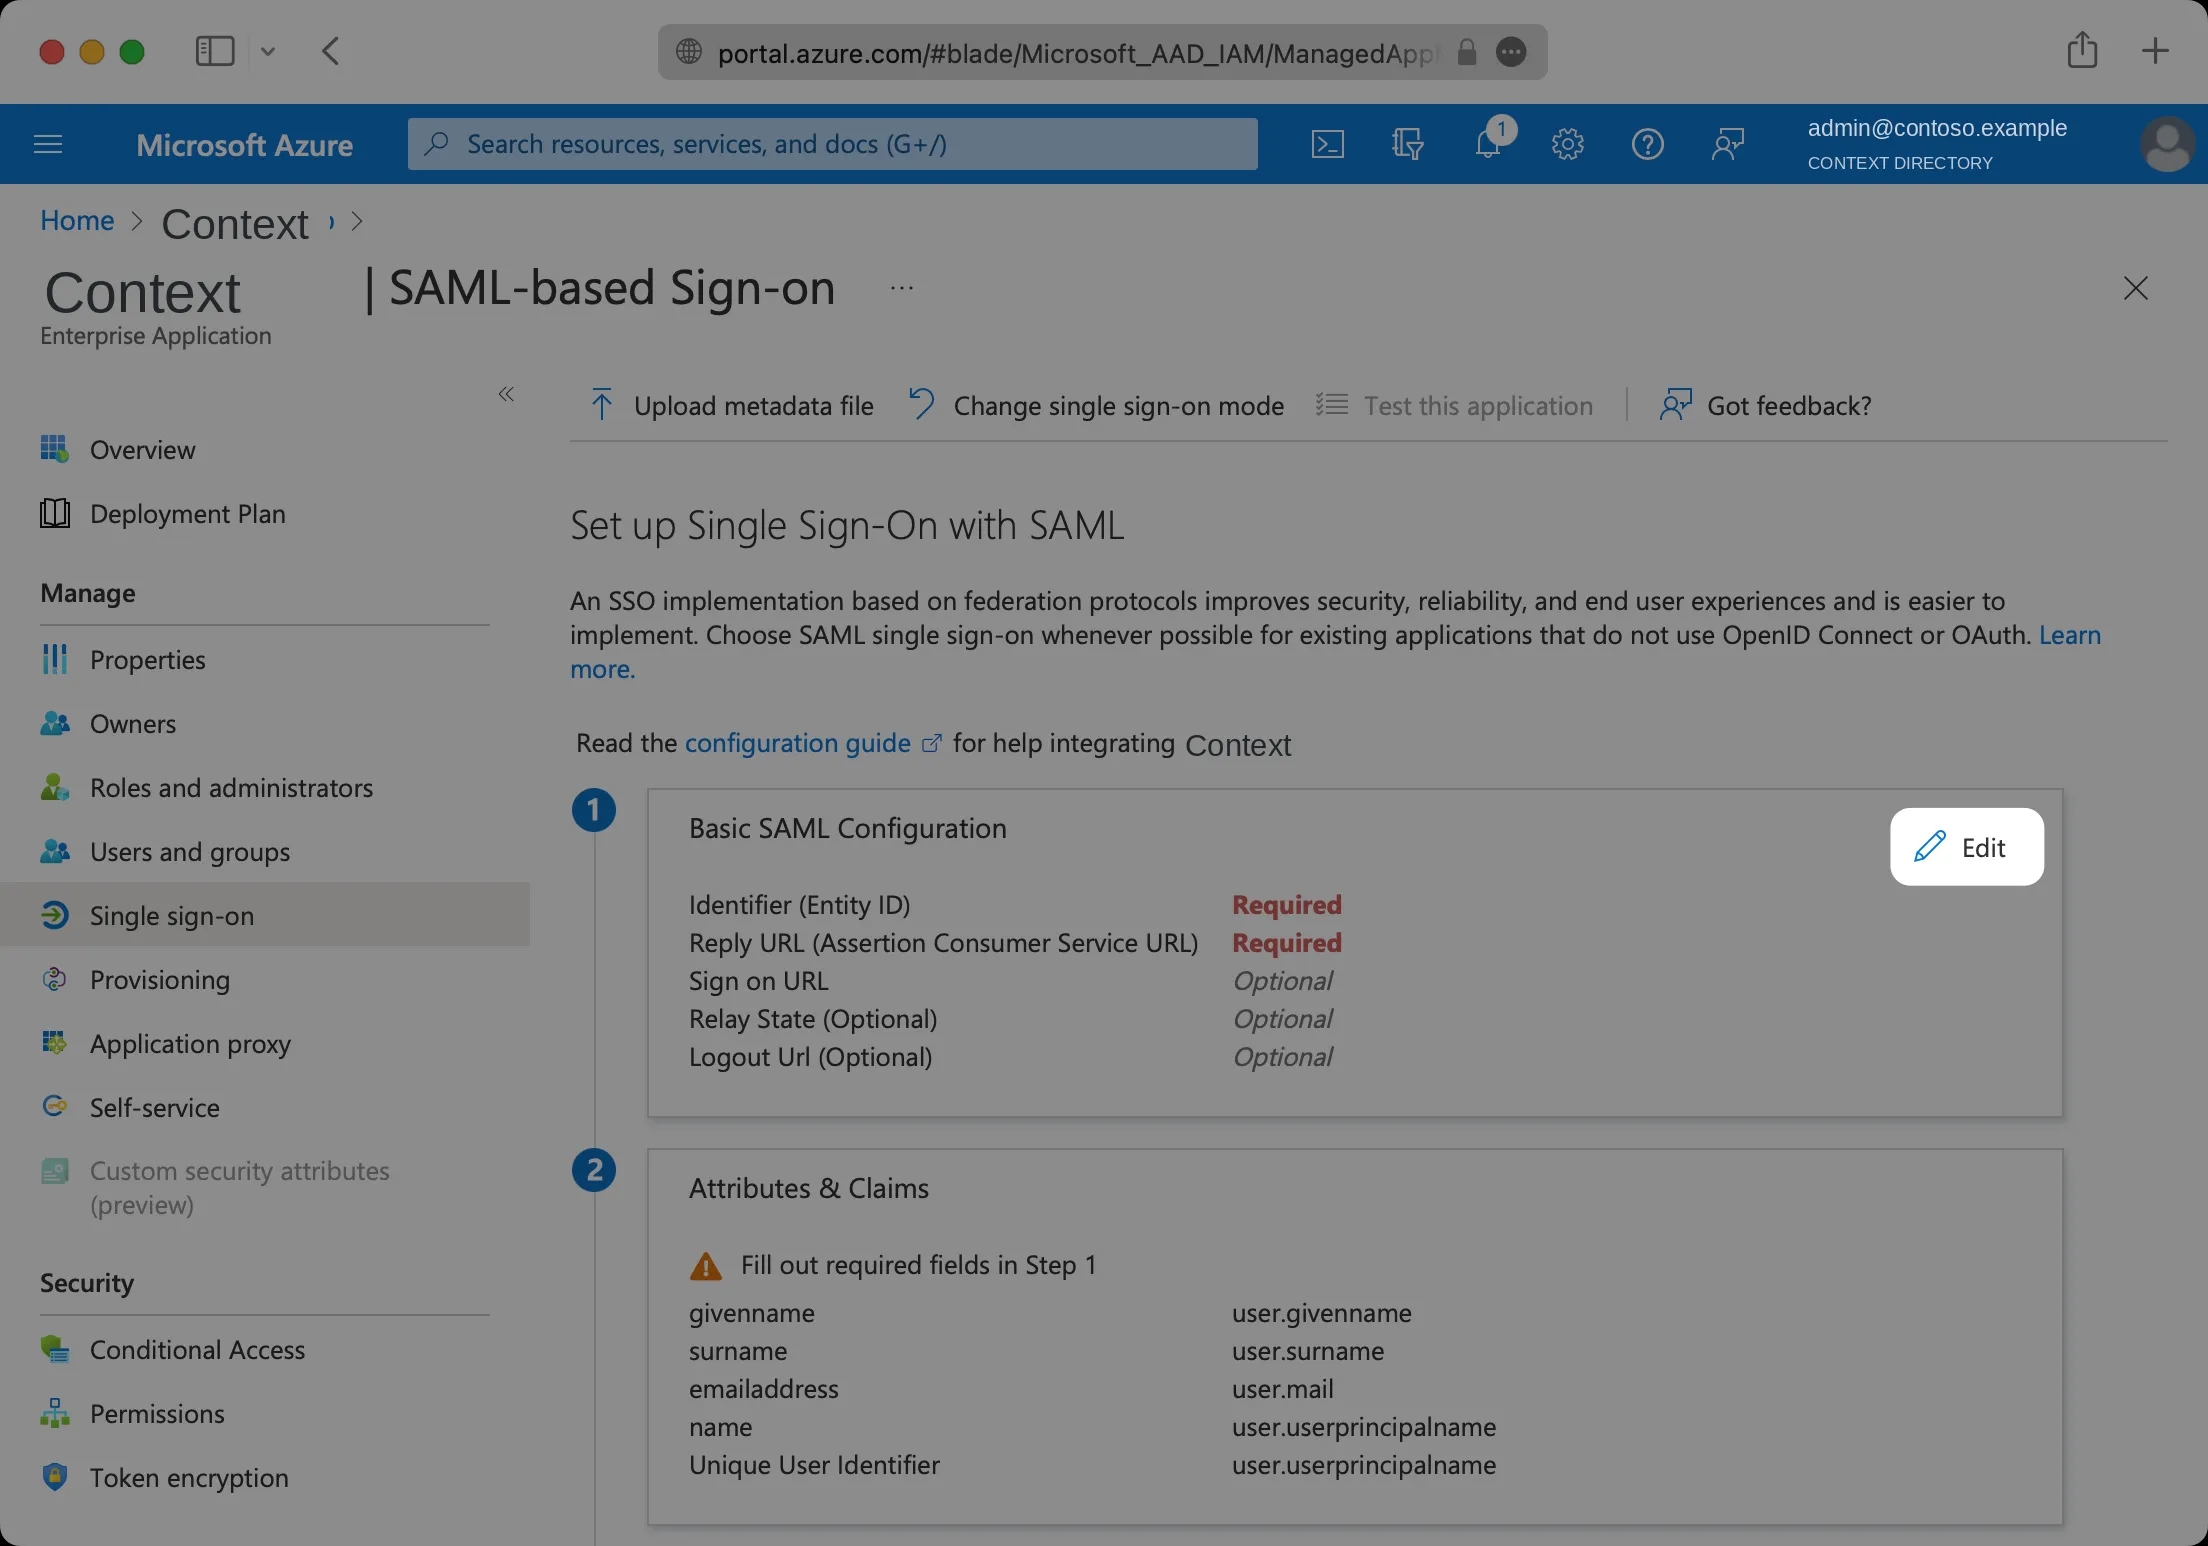
On Set up Single Sign-On with SAML, select Edit in the Basic SAML Configuration section.
-
Paste the Context Service provider entity ID into Identifier (Entity ID) and the ACS URL into Reply URL (Assertion Consumer Service URL).
-
Leave Relay State and Logout URL empty, then select Save.
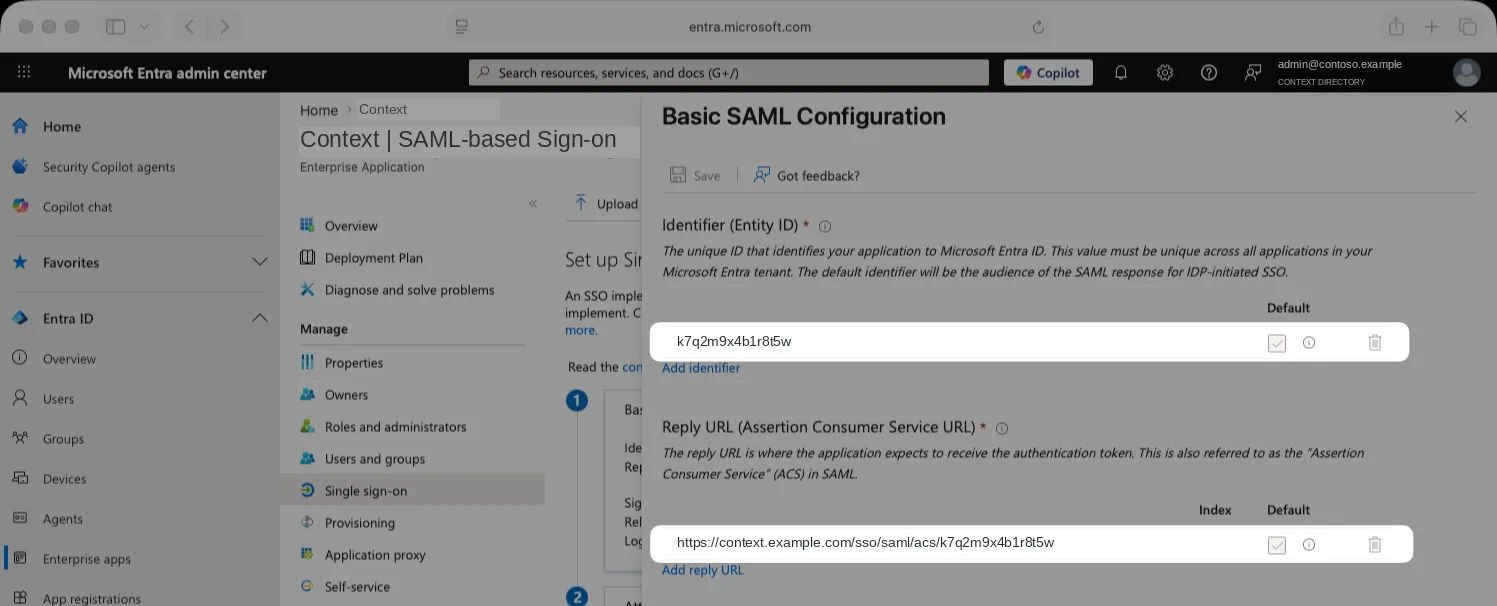
The entity ID may be a short identifier rather than a web address; keep it exactly as shown.
Step 5: Configure user attributes and claims
-
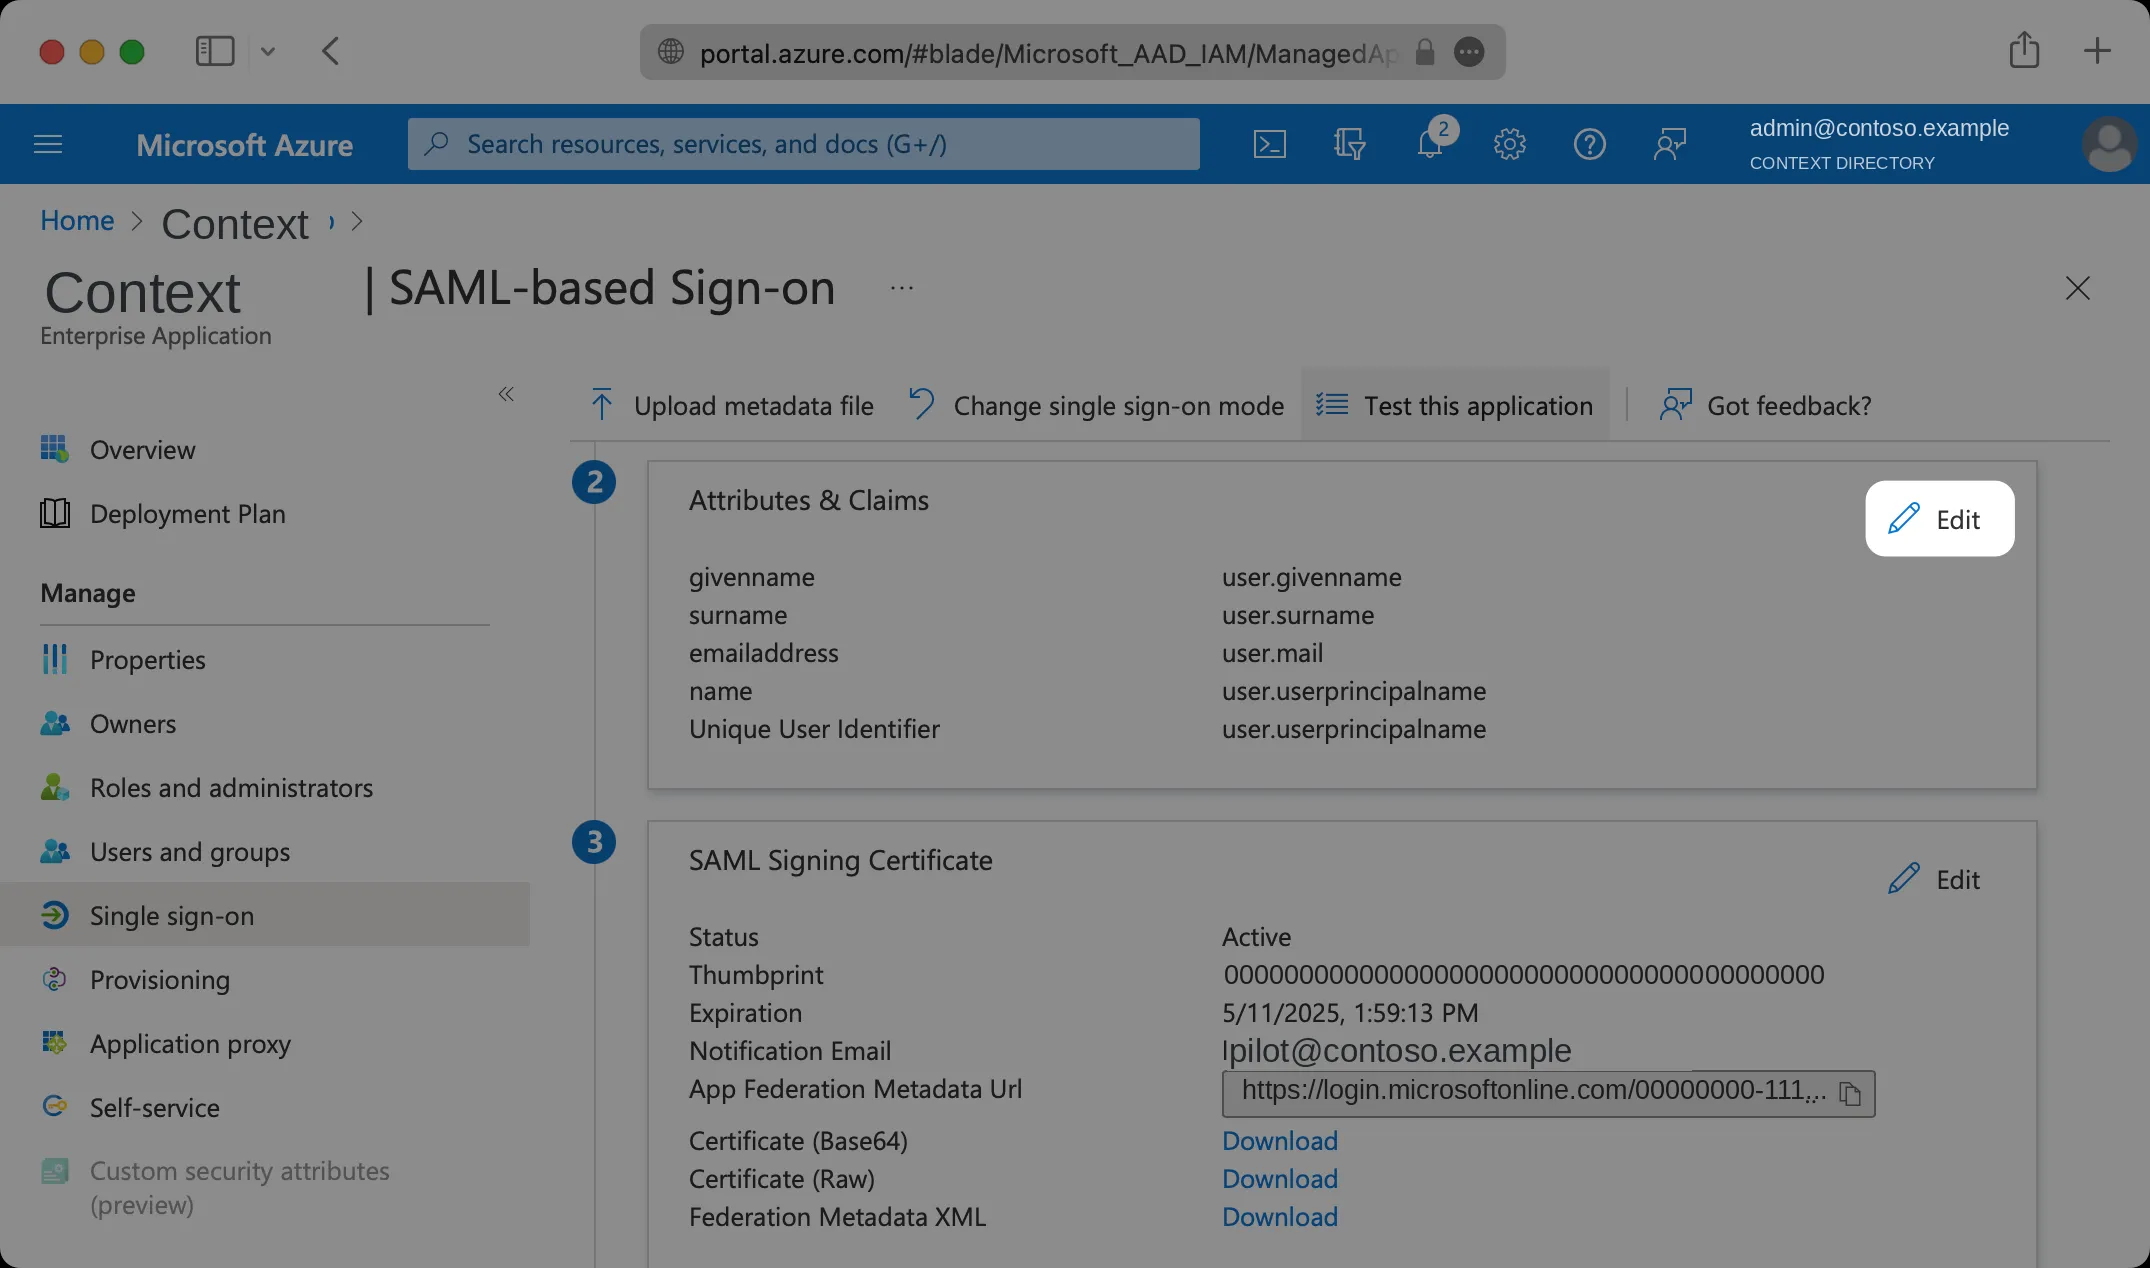
Select Edit in the Attributes & Claims section.
-
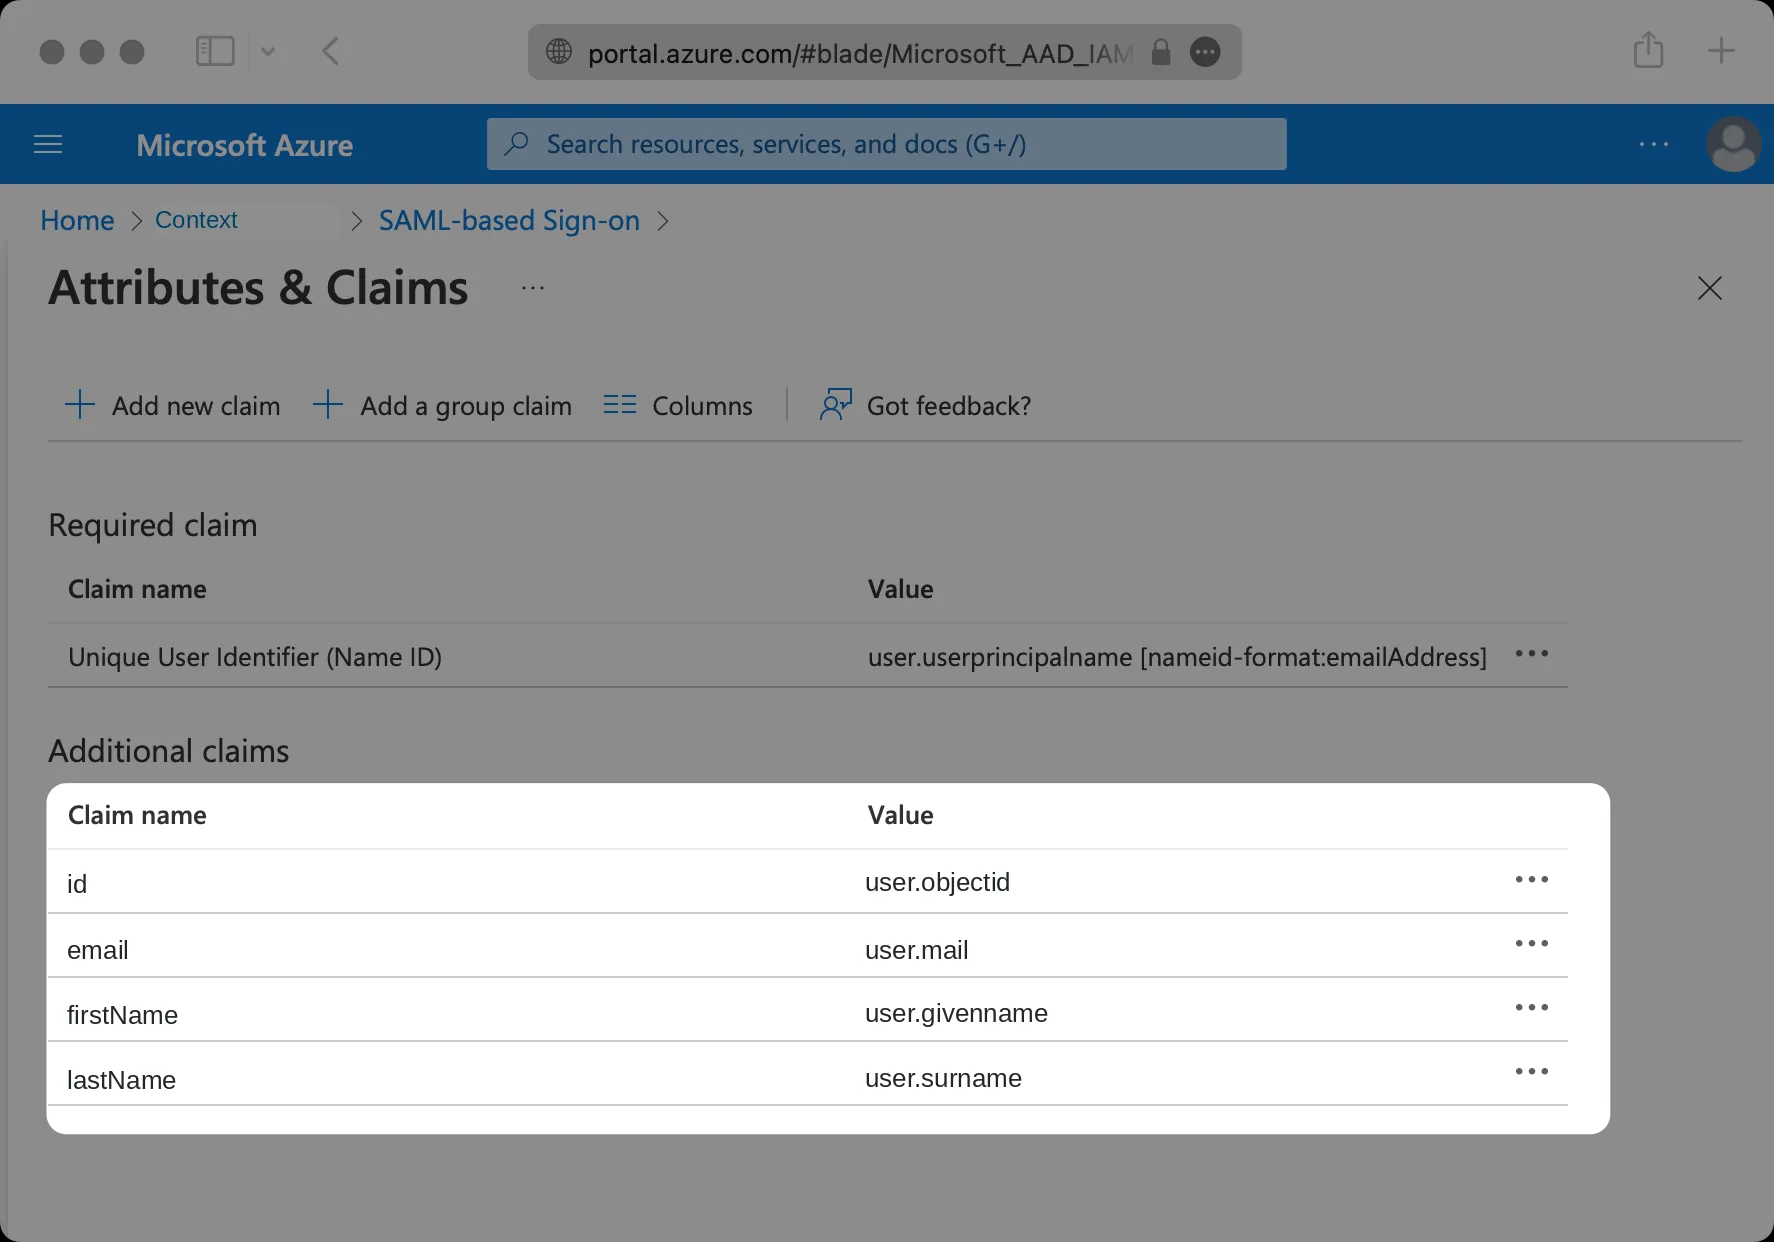
Select Add new claim for each claim below. Use Attribute as the source and leave Namespace empty.
Claim name Source attribute iduser.objectidemailuser.mailfirstNameuser.givennamelastNameuser.surname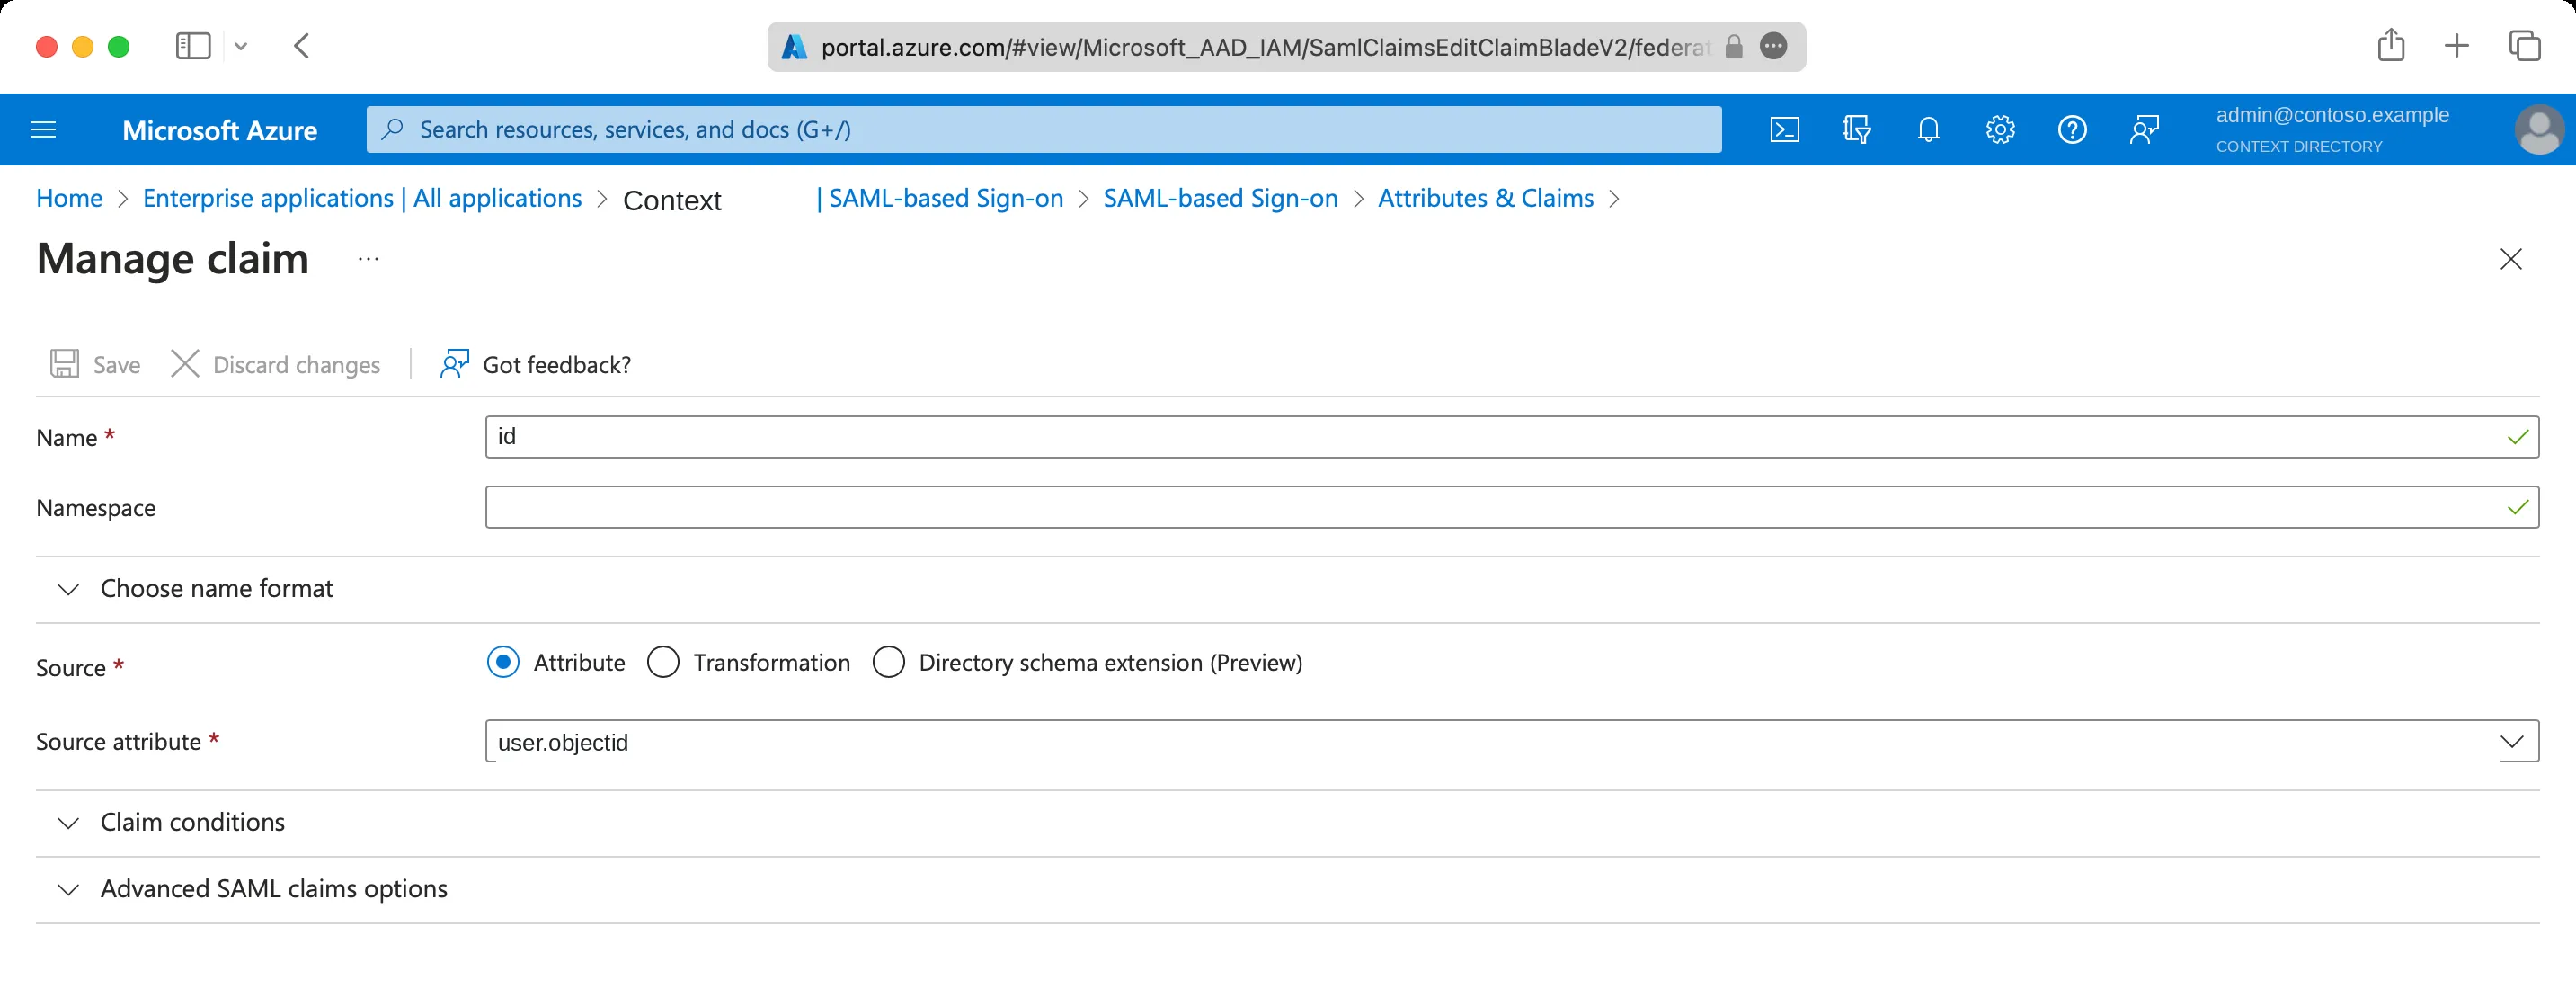
-
Your claims list should now show all four.
Important
Claim names are case-sensitive, and Entra’s default namespaced claims do not replace them. Leave Unique User Identifier (Name ID) at its default, user.userprincipalname, and don’t change the id source once people are using SSO.
Step 6: Add users to the SAML application
-
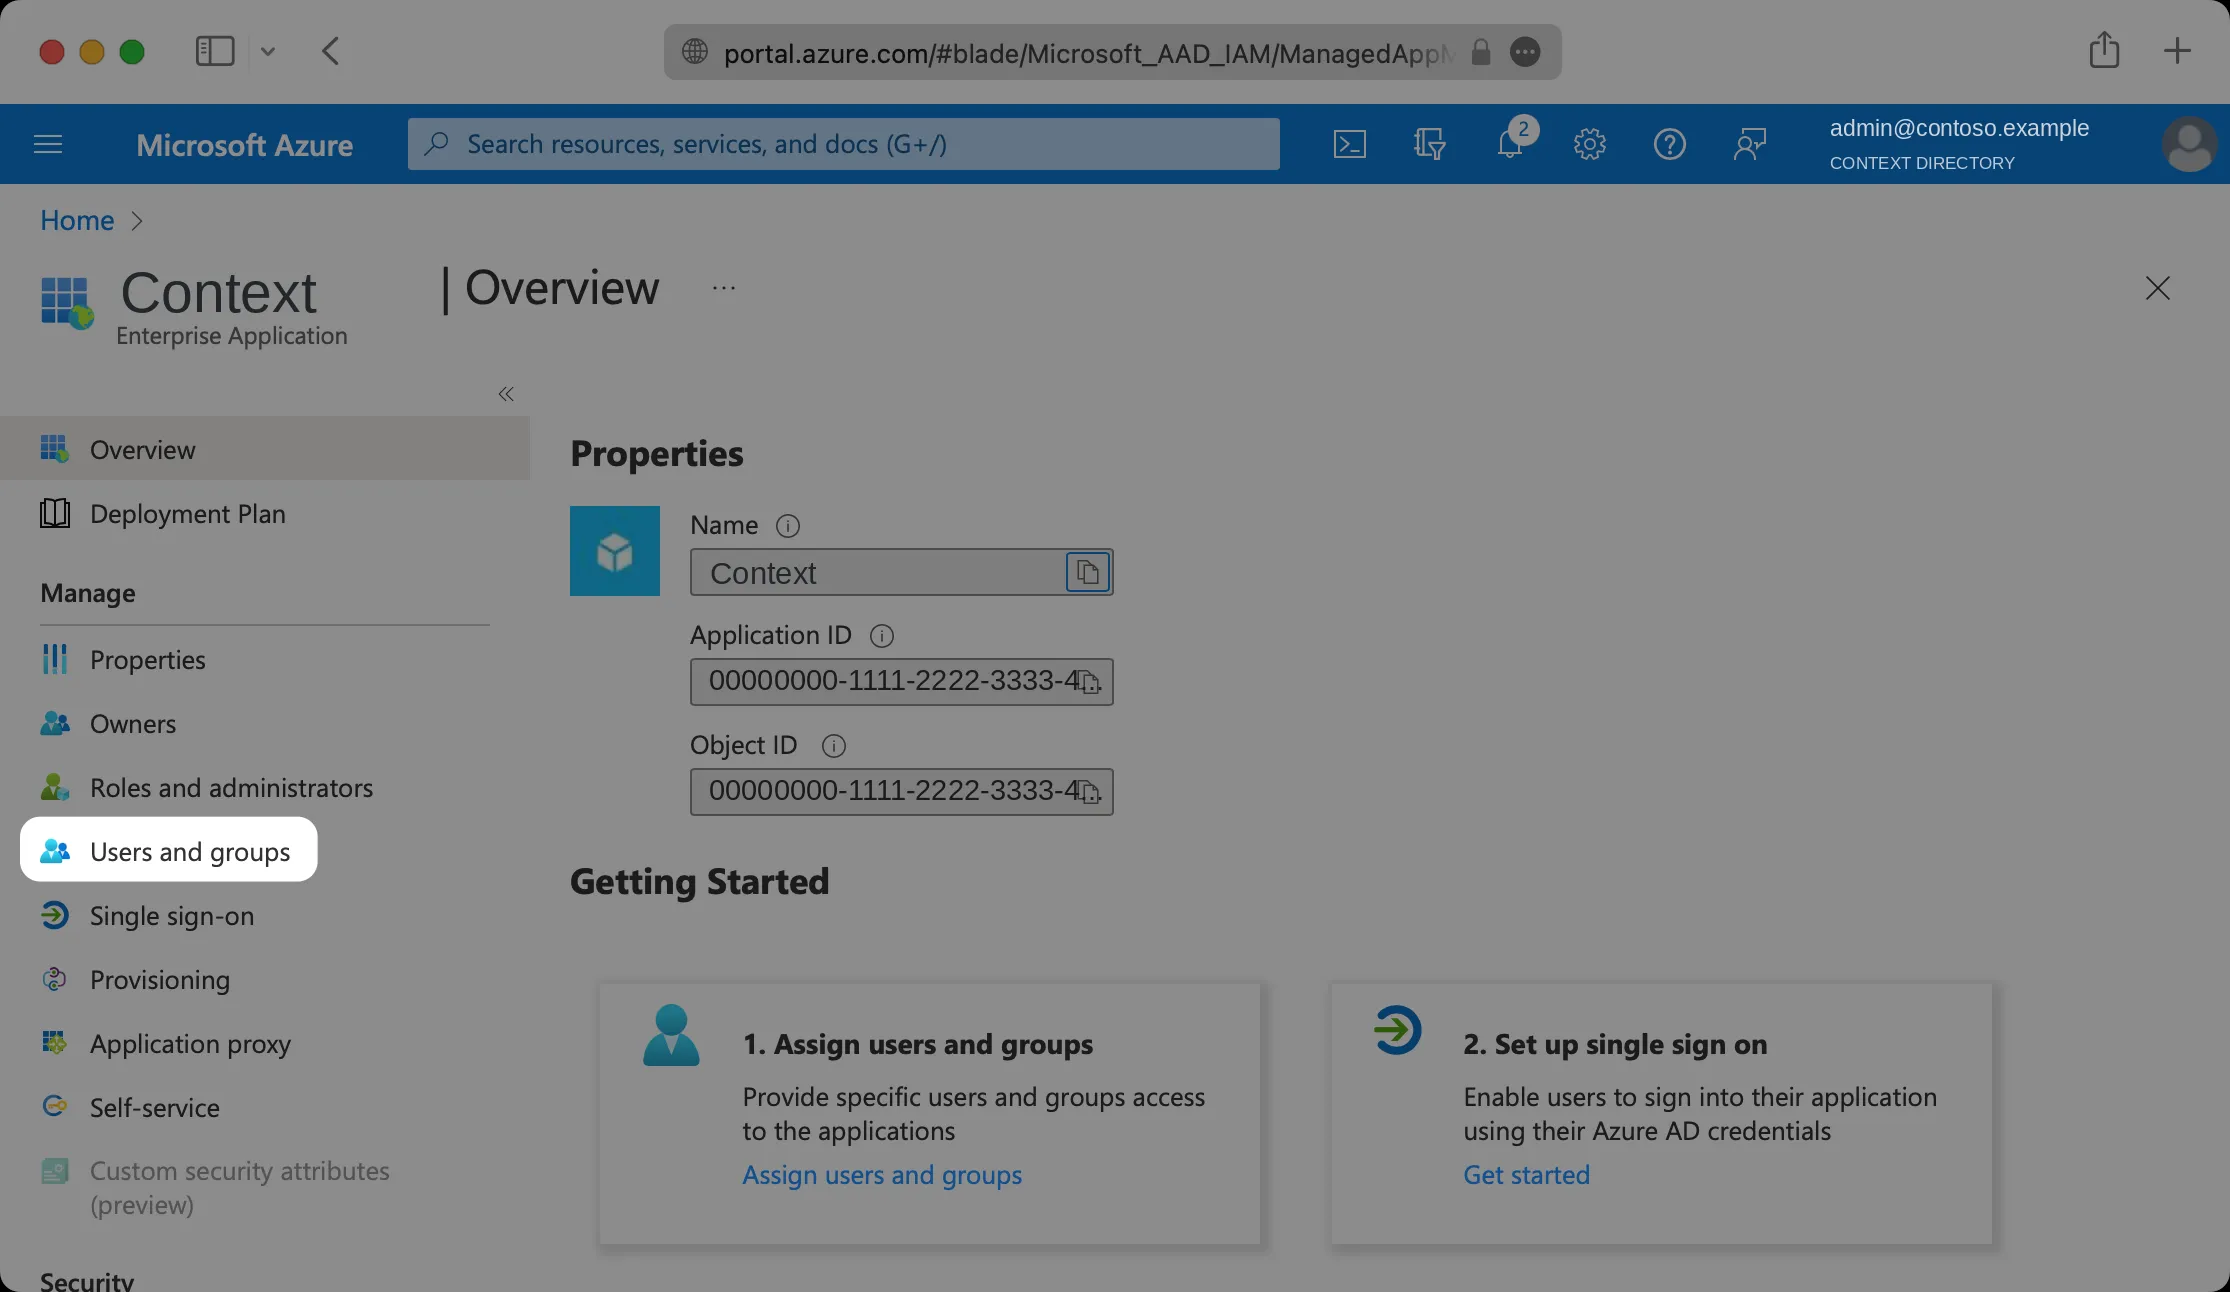
Open Manage → Users and groups.
-
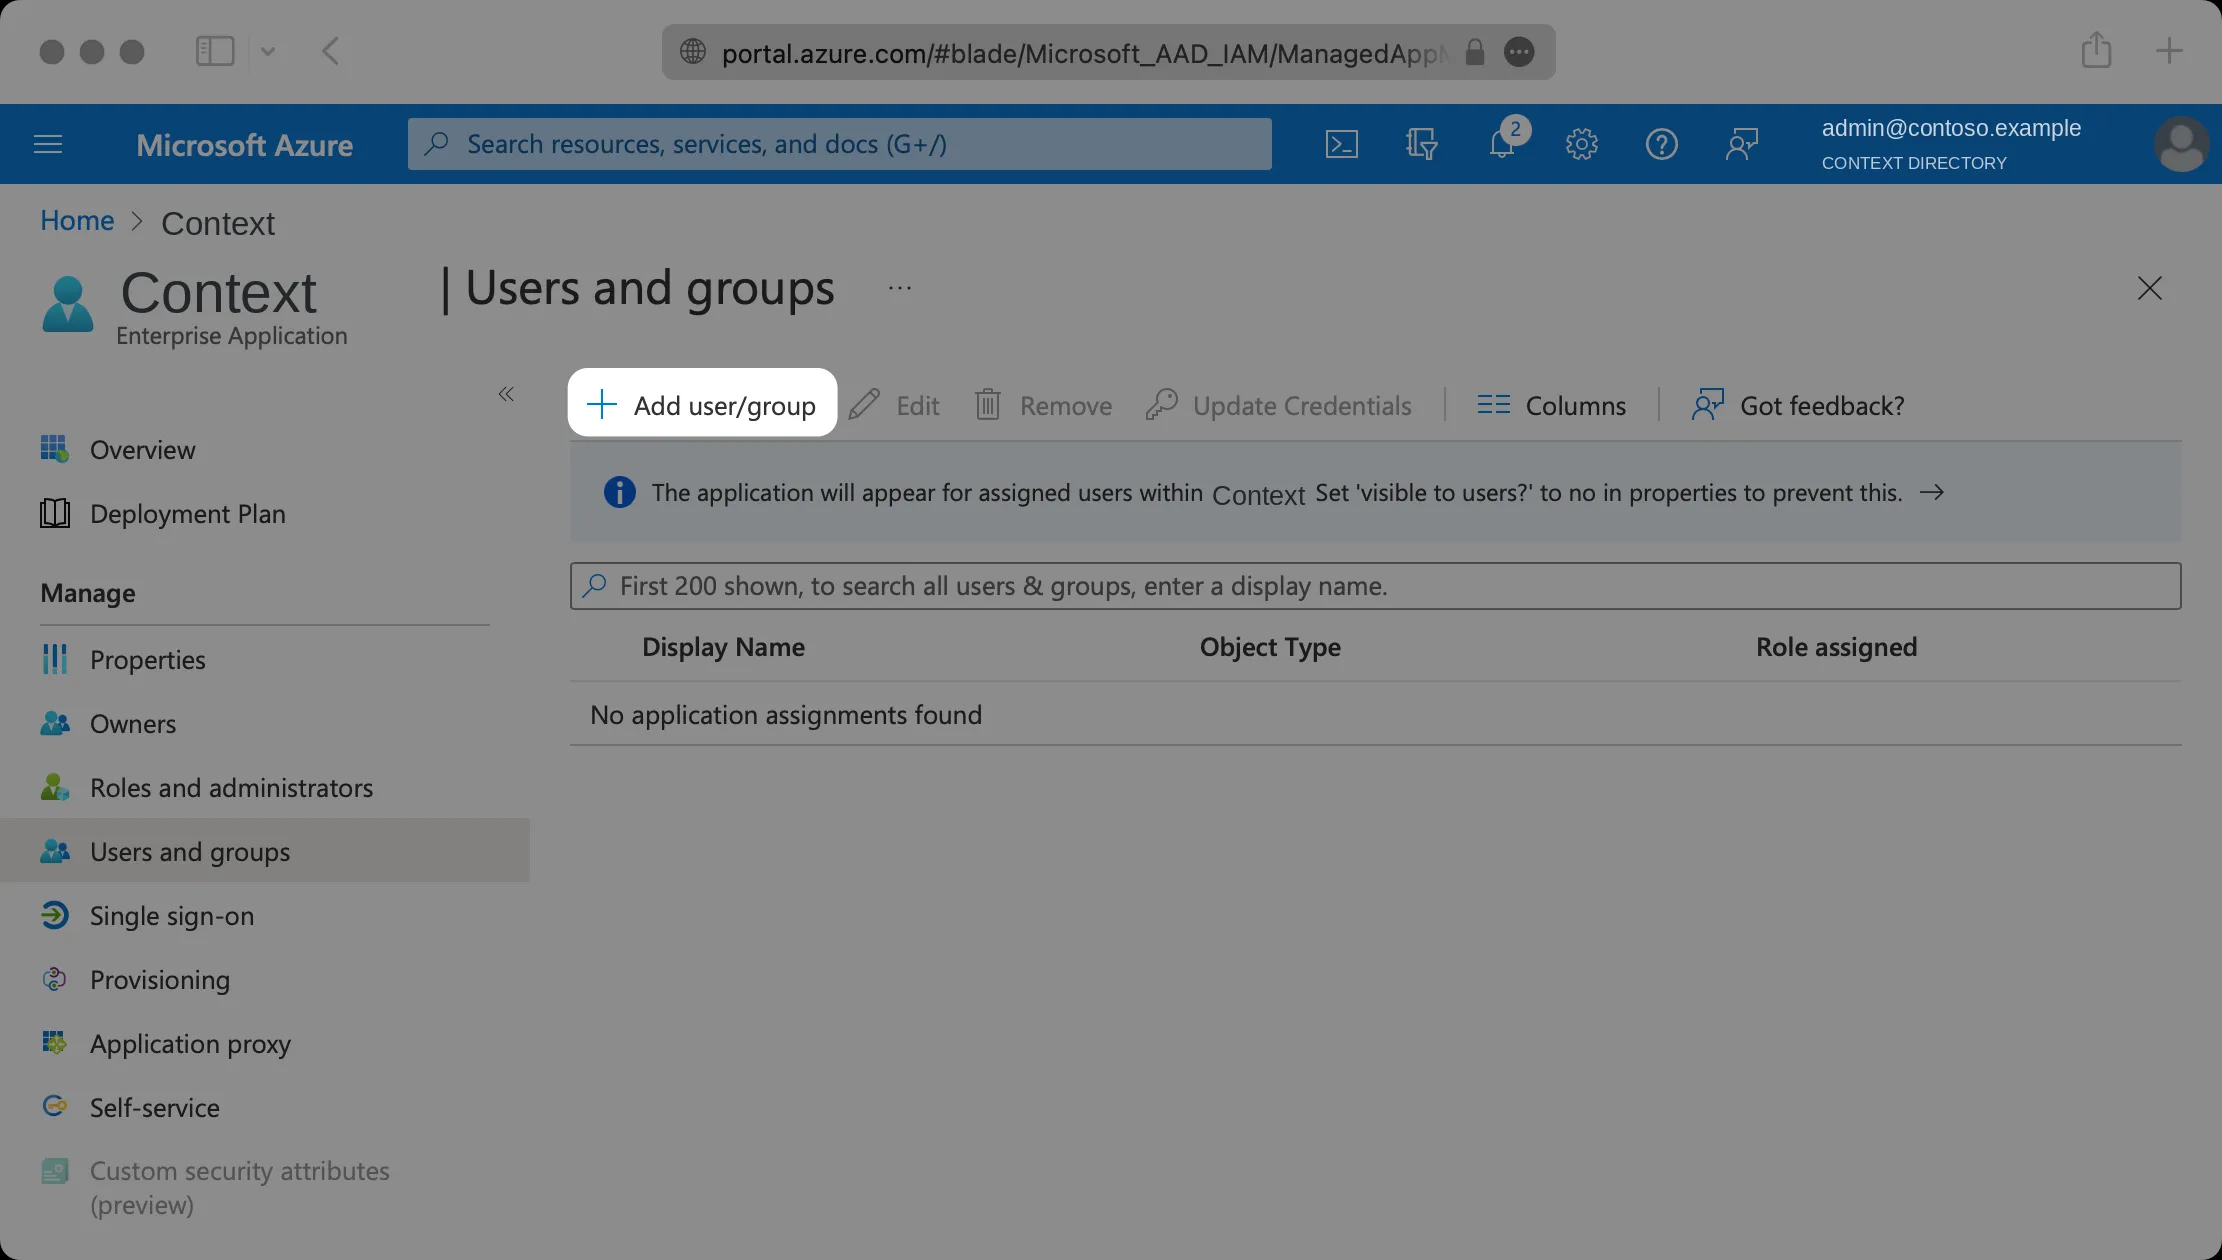
Select Add user/group.
-
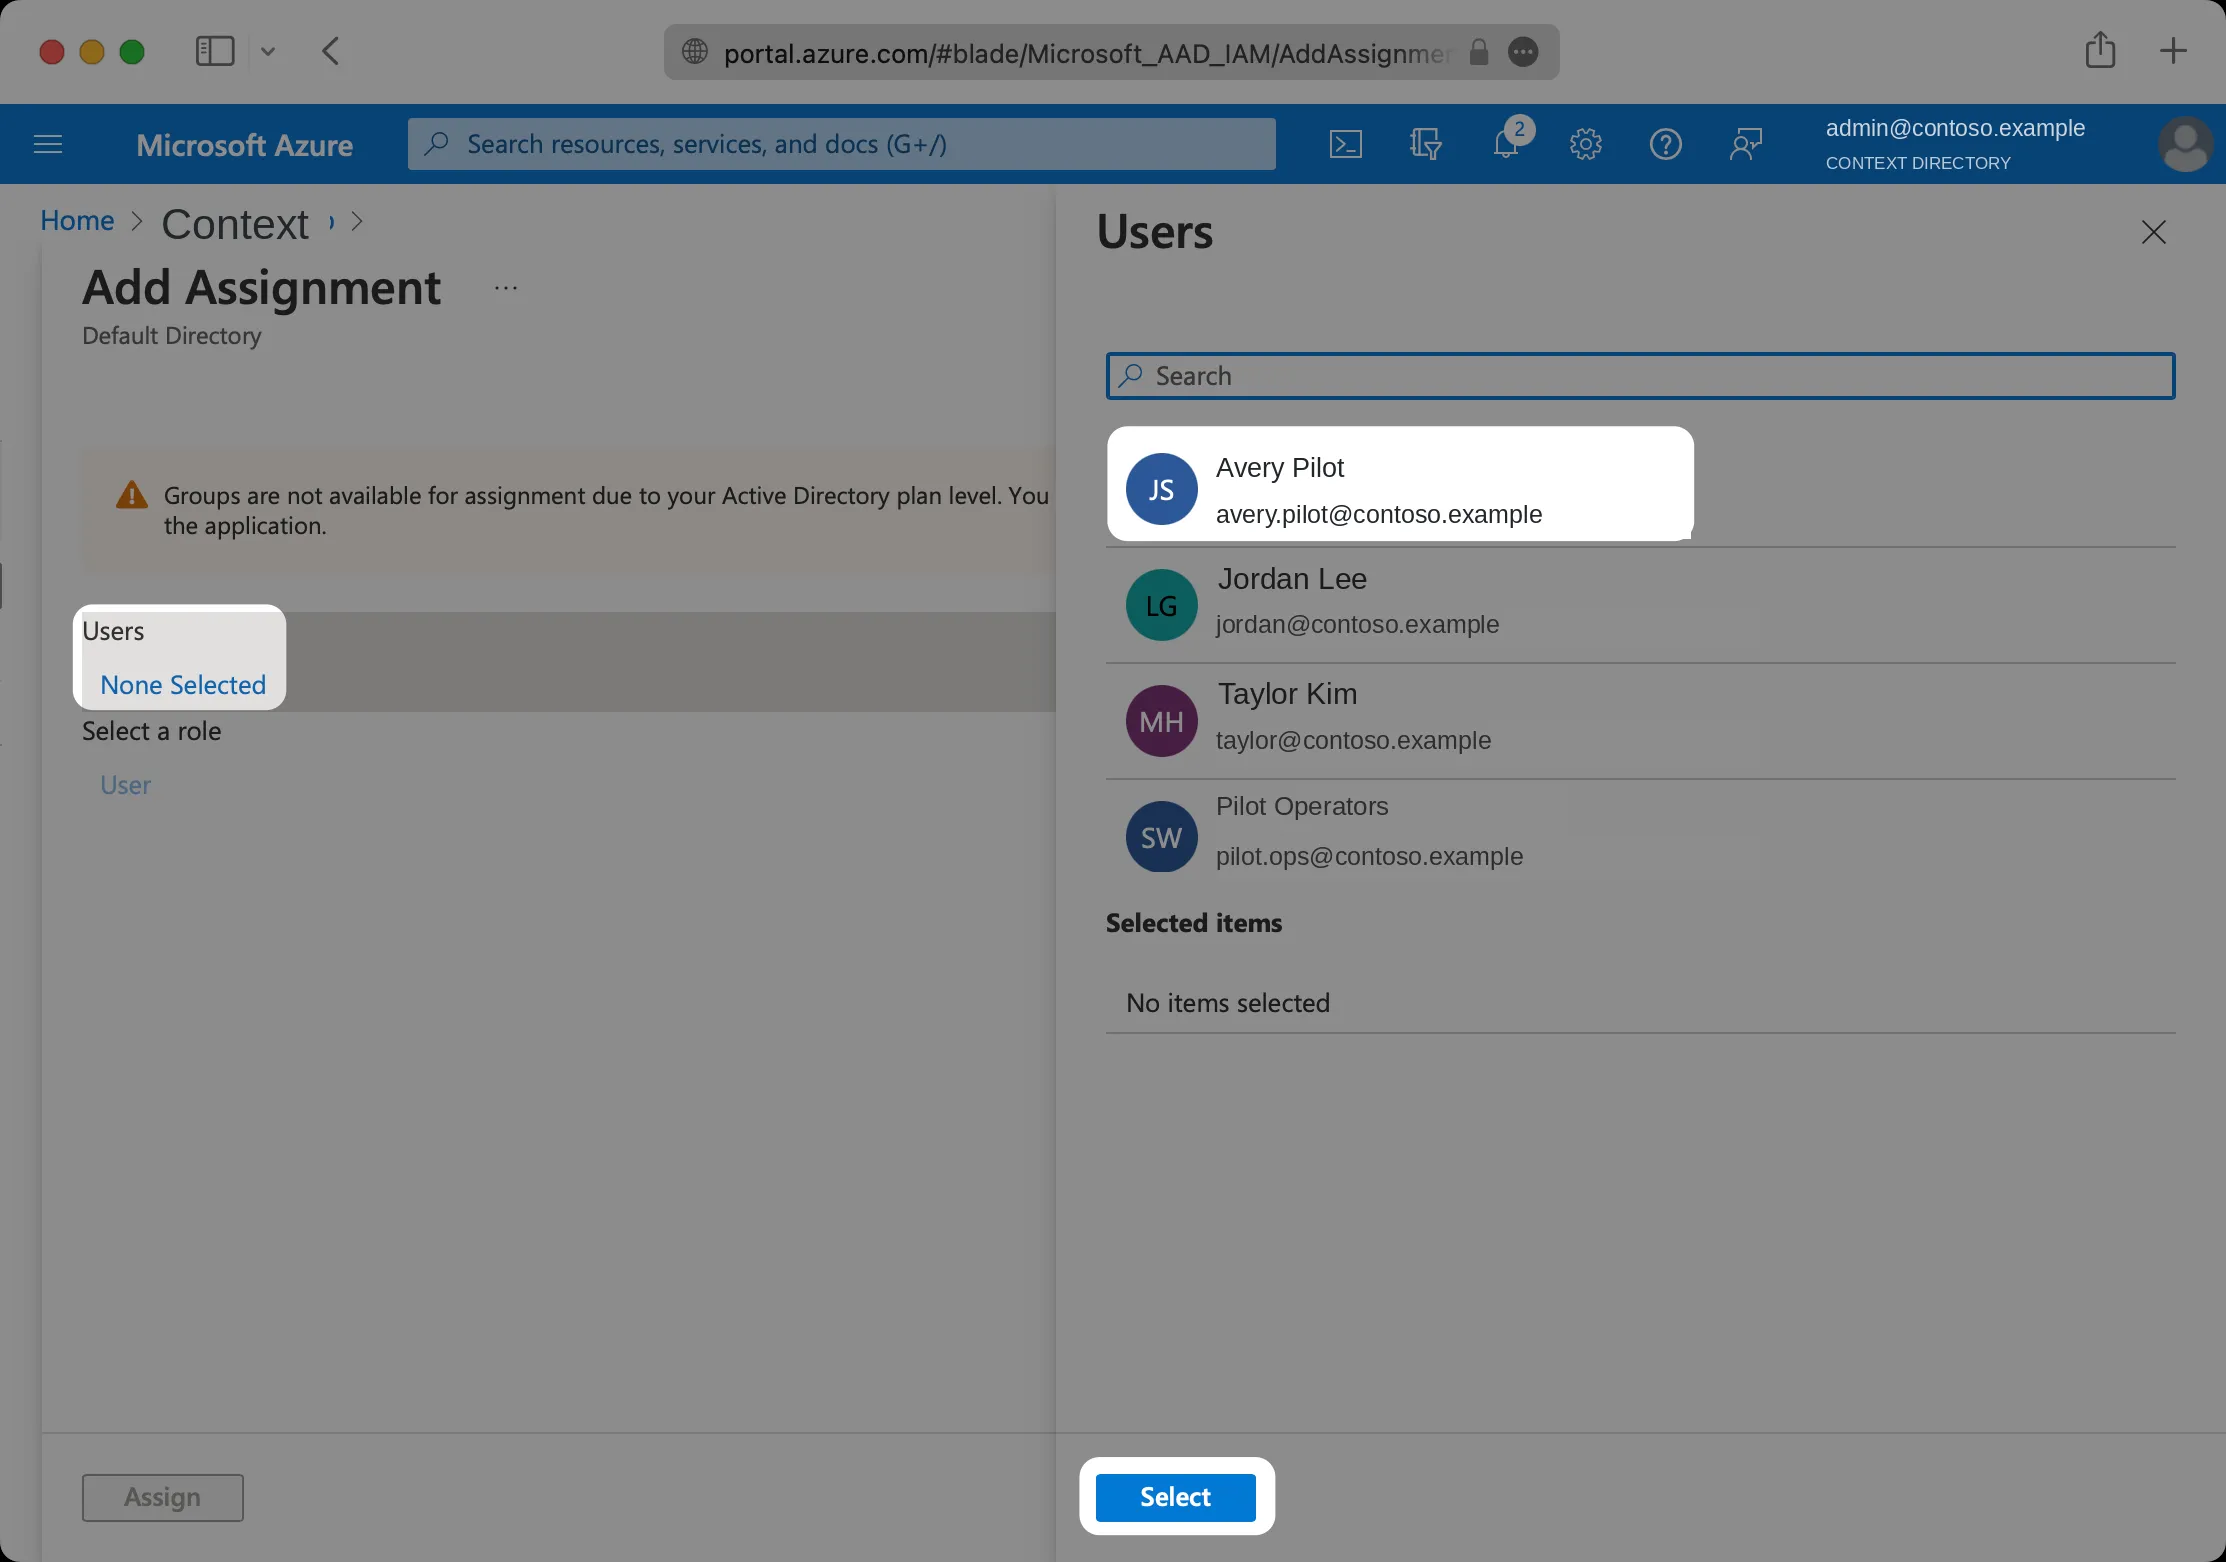
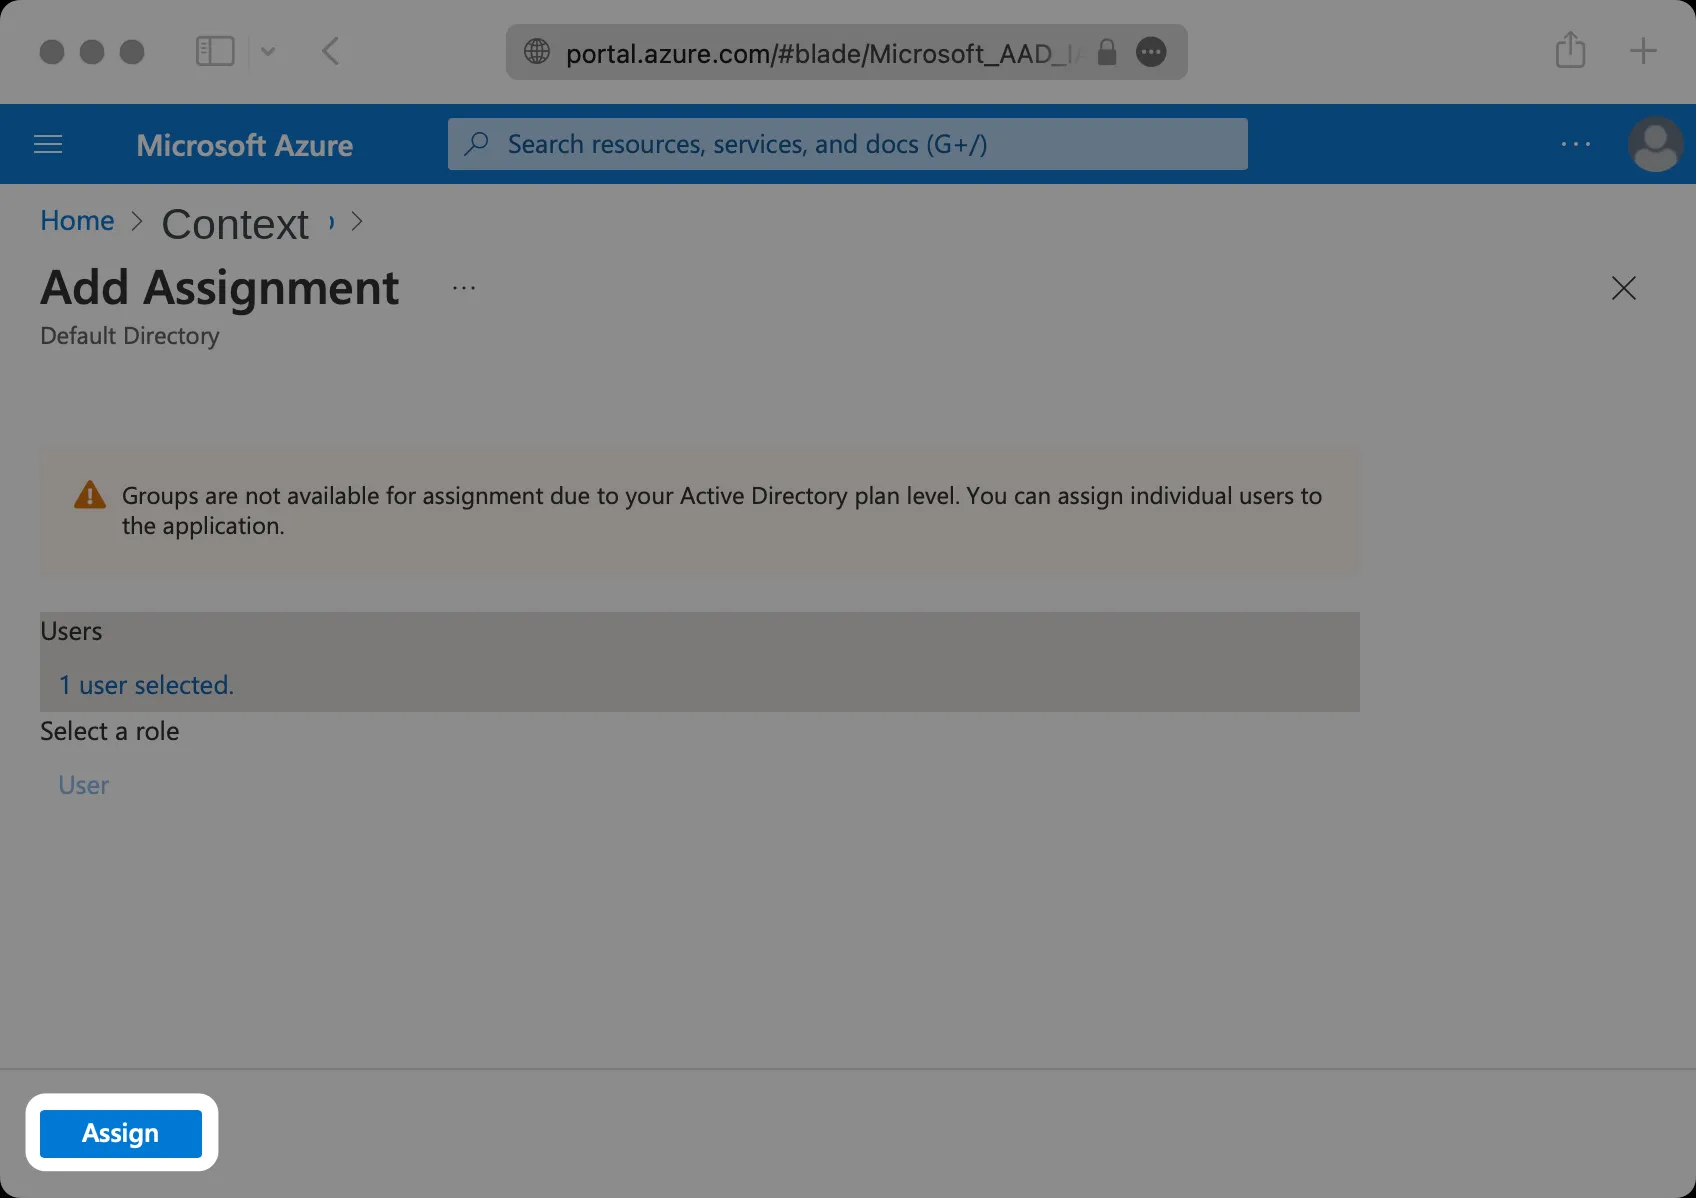
Under Users and groups, select None Selected, choose your pilot users, then select Select. Start with individual users: assigning groups requires Entra ID P1 or P2, and members of nested groups are not included.
-
Select Assign.
-
Under Manage → Properties, set Assignment required? to Yes and save, so only assigned people can sign in.
Step 7: Obtain identity provider details
-
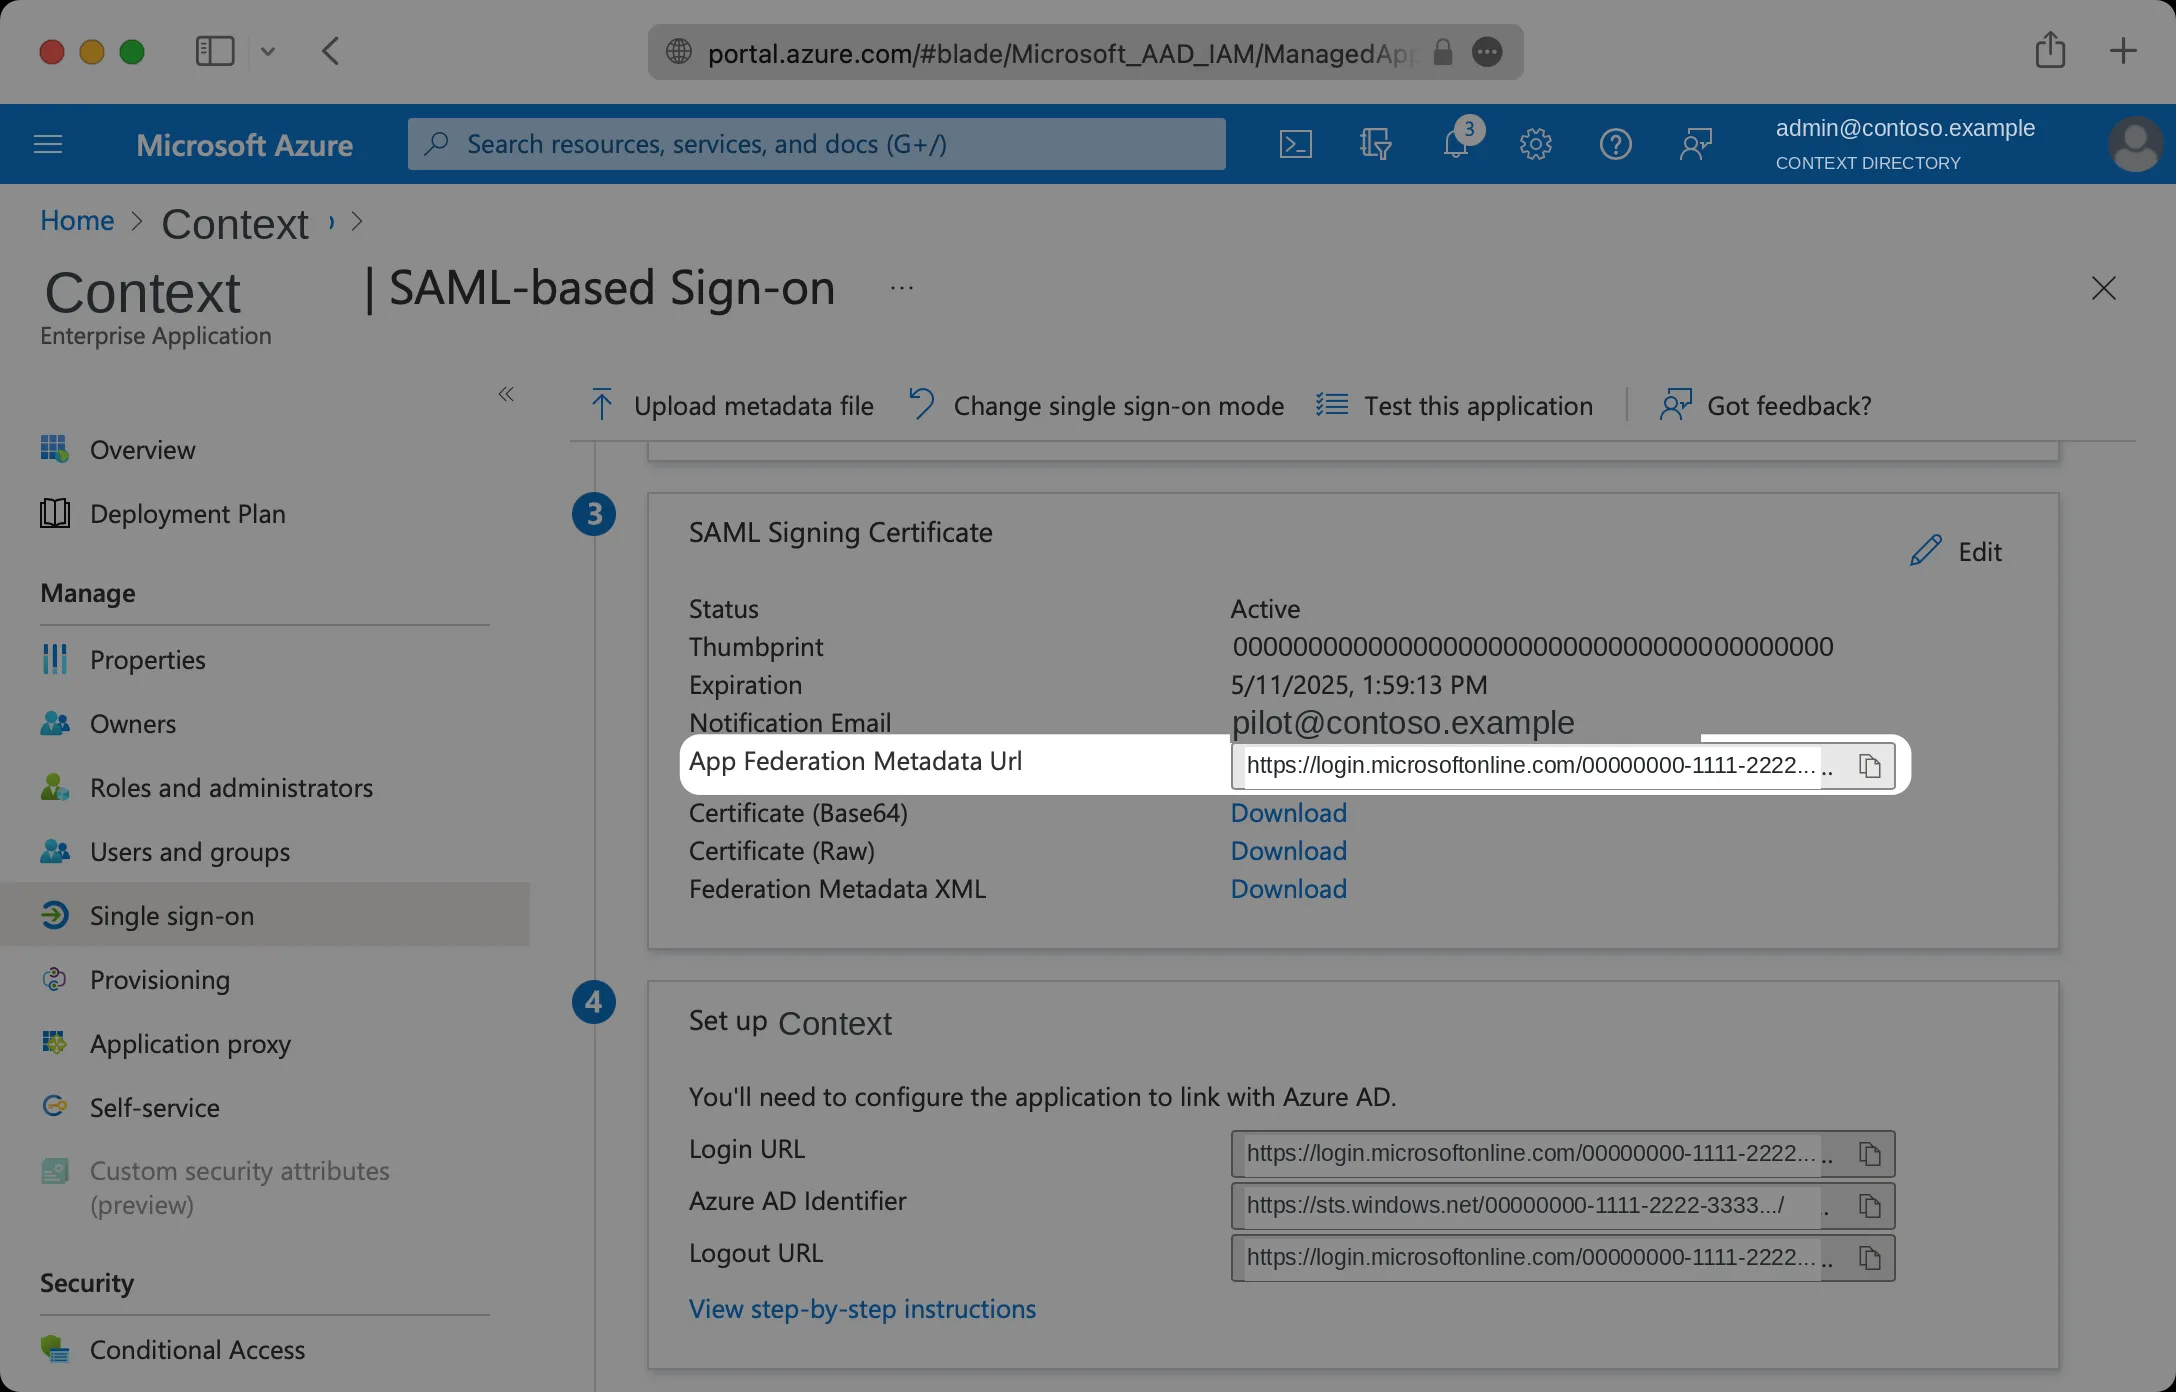
Go back to Manage → Single sign-on. In the SAML Certificates section, copy the App Federation Metadata URL.
-
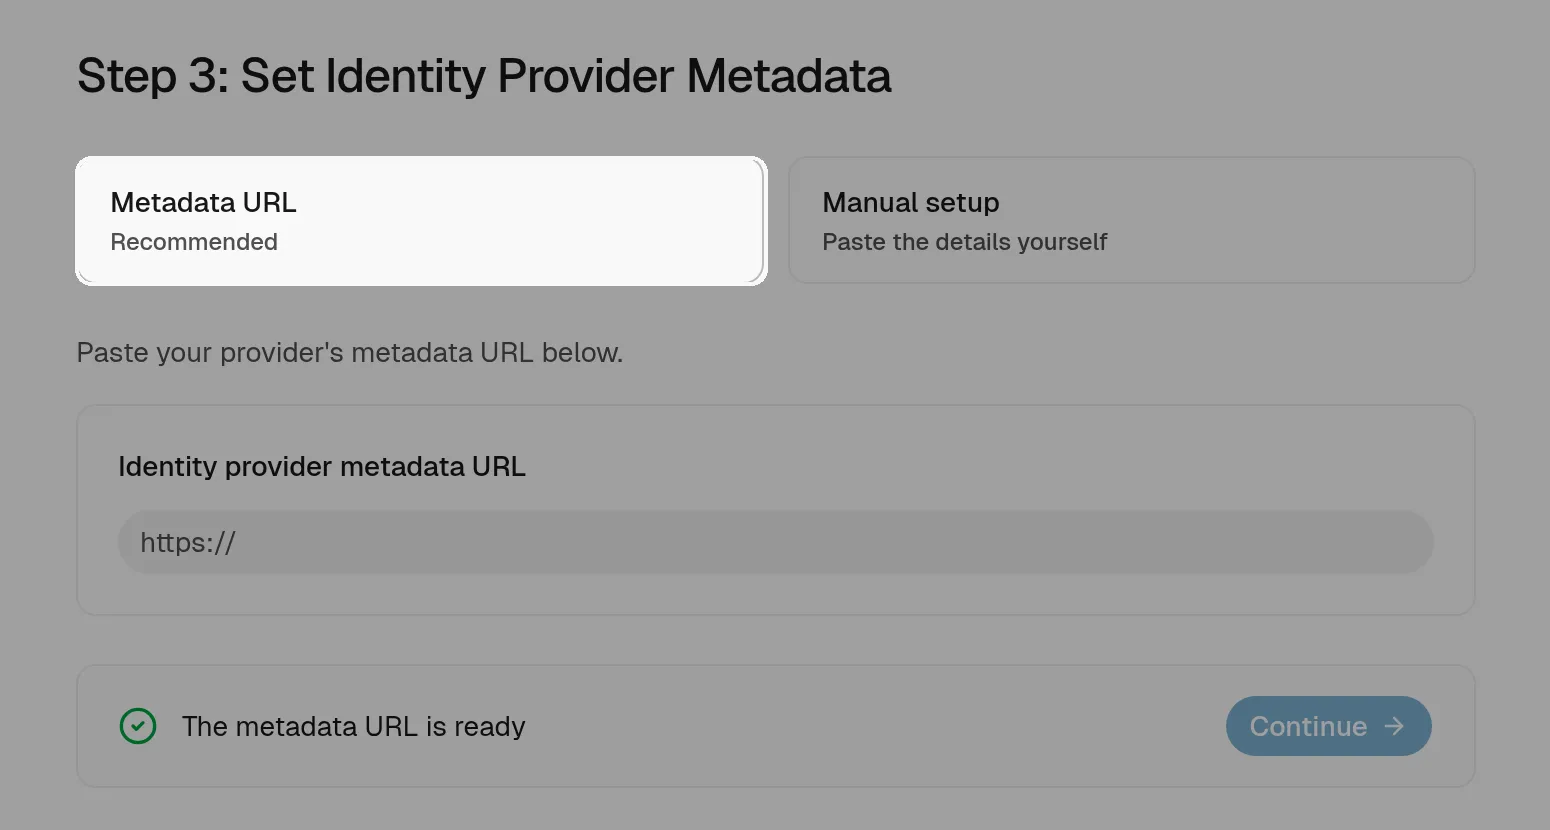
In Context, select The app is ready to continue to Set Identity Provider Metadata, and choose the Metadata URL option.
-
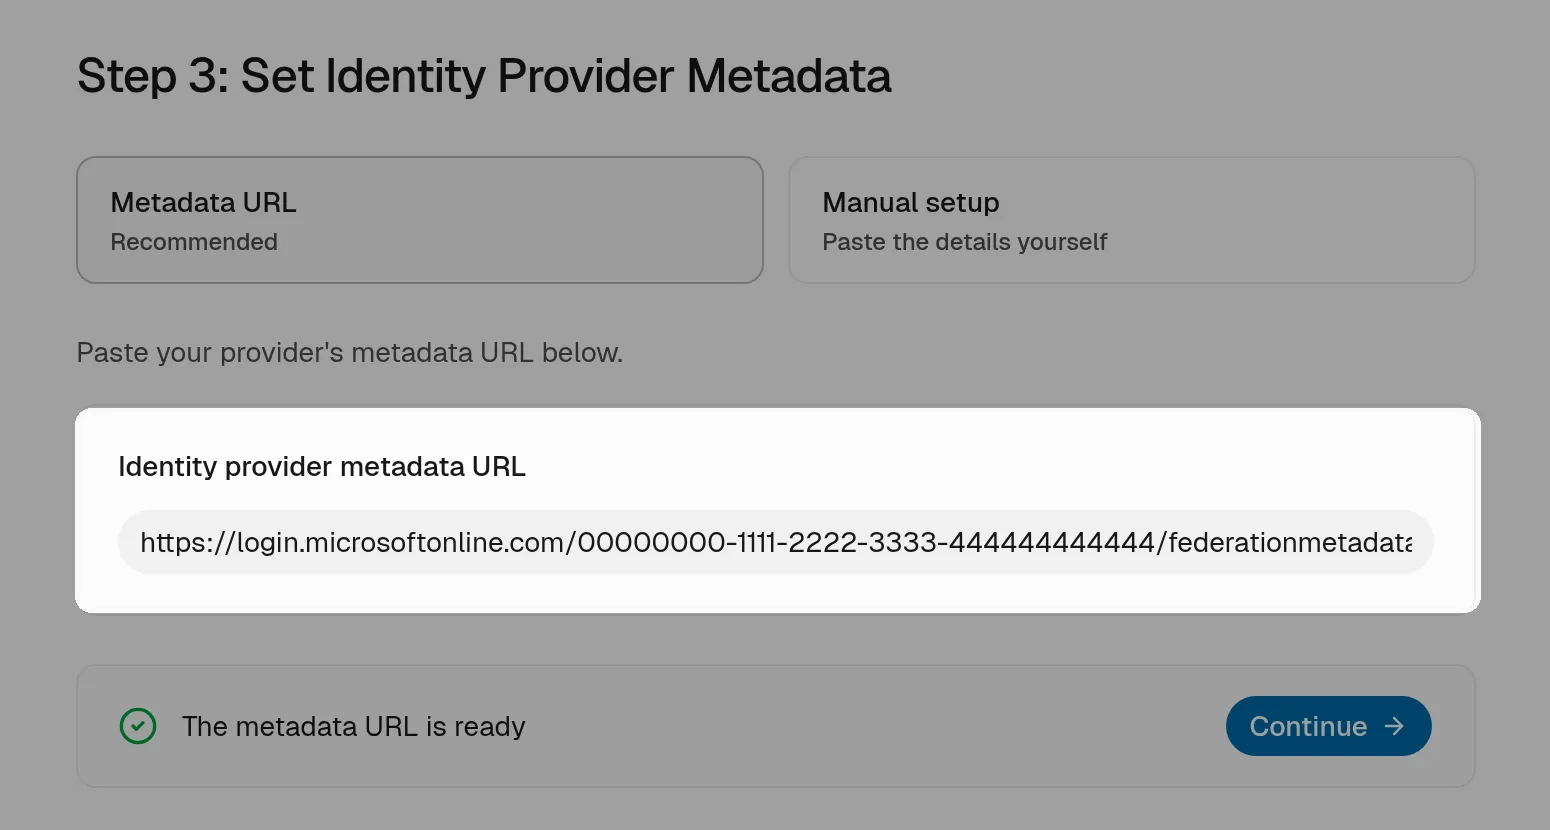
Paste the URL into Identity provider metadata URL and select Continue.
-
On Configure SAML Attributes, confirm the attributes from step 5 (
id,email,firstName,lastName), then select Continue. -
On Test Single Sign-On, select Go to sign-in and sign in as a pilot user. When the test has worked, select Continue.
-
On Confirm test user, check that the name, email and ID Context received are correct.
-
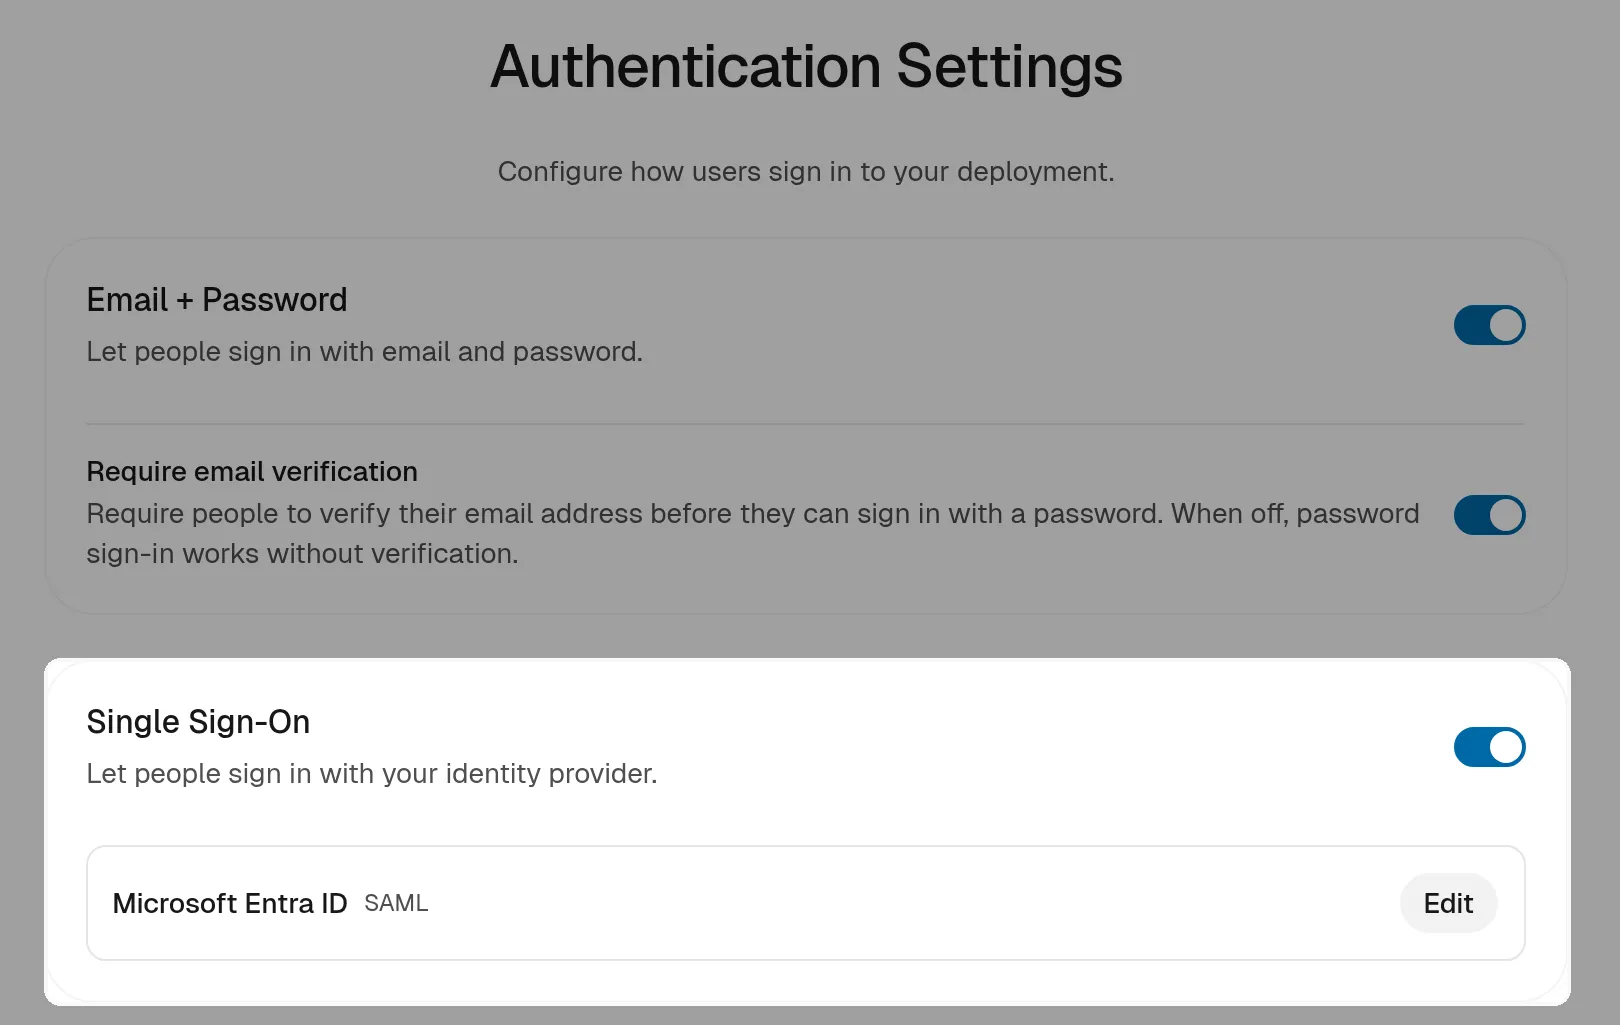
Select Turn on, then enable the Single Sign-On toggle in the setup console.
Warning
Keep Email + Password sign-in available until a second administrator has confirmed SSO access.
- Existing accounts. A person who already has a Context account (for example, from Email + Password) is linked to SSO only when all three hold: the provider is bound to an organization on SSO domains with their email domain, those domains are verified (Verify domains), and their own Context email is verified. Otherwise their SSO sign-in ends on “SSO sign-in failed” and they keep signing in with Email + Password. The provider this setup creates is not bound to an organization, and email verification is off by default, so bind and verify the domains before you invite existing users to SSO (see SSO discovery domains).
- SSO only handles sign-in: organization and workspace membership are separate Context settings, and turning SSO on doesn’t change them.